VAT Registration User Manual - Oct 2022
VAT Registration User Manual
Date: Oct 2022 | Version: 1.0.0.0
Contents
1. Document Control Information
2. Annexure - List of other user manuals that can be referred to
3. Navigating through EmaraTax
4. Introduction
6. EmaraTax Taxable person dashboard
7. Guidelines and Instructions
12. Owner Details
13. Branch Details
15. Taxable supplies and Taxable expenses
16. Contact Details
19. Bank Details
22. Custom details
25. Post Application Submission
26. Correspondences
1. Document Control Information
Document Version Control
Version No. | Date | Prepared/Reviewed by | Comments |
1.0 | 01-Oct-22 | Federal Tax Authority | User Manual for EmaraTax Portal |
2. Annexure - List of other user manuals that can be referred to
The below are the list of User manuals that you can refer to
S. No | User Manual Name | Description |
1 | Register as Online User | This manual is prepared to help you navigate through the Federal Tax Authority (FTA) website and create an EmaraTax account with the FTA. |
2 | Manage online user profile | This manual is prepared to provide you an understanding on Login process, user types, forgot password and modify online user profile functionalities. |
3 | User Authorisation | This manual is prepared to provide you an understanding on Account Admin, Online User, and Taxable Person account definitions and functionalities. |
4 | Taxable person dashboard | This manual is prepared to help the following 'Taxable person' users to navigate through their dashboard in the Federal Tax Authority (FTA) EmaraTax Portal:
|
5 | Link TRN to email address | This manual is prepared to help you navigate through the Federal Tax Authority (FTA) website to Link TRN to New Email Address. |
3. Navigating through EmaraTax
The Following Tabs and Buttons are available to help you navigate through this process
Button | Description |
In the Portal | |
 | This is used to toggle between various personas within the user profile such as Taxable Person, Tax Agent, Tax Agency, Legal Representative etc |
 | This is used to enable the Text to Speech feature of the portal |
 | This is used to toggle between the English and Arabic versions of the portal |
 | This is used to decrease, reset, and increase the screen resolution of the user interface of the portal |
 | This is used to manage the user profile details such as the Name, Registered Email address, Registered Mobile number, and password |
 | This is used to log off from the portal |
In the Business Process application | |
 | This is used to go the Previous section of the Input Form |
 | This is used to go the Next section of the Input Form |
 | This is used to save the application as draft, so that it can be completed later |
 | This menu on the top gives an overview of the various sections within the. All the sections need to be completed in order to submit the application for review. The Current section is highlighted in Blue and the completed sections are highlighted in green with a check |
The Federal Tax Authority offers a range of comprehensive and distinguished electronic services in order to provide the opportunity for taxpayers to benefit from these services in the best and simplest ways. To get more information on these services Click Here
4. Introduction
This manual is prepared to help a taxpayer to navigate through the Federal Tax Authority (FTA) portal and submit the VAT Registration application. You must be eligible to register for VAT mandatorily or voluntarily as per the turn over threshold and criteria stipulated in Federal Decree-Law No. 8 of 2017 on Value Added Tax. The applicant can be a natural person (For Example, individual), or a legal person (For Example, a Public Joint Stock Company, Incorporated, government body).
5. Login to EmaraTax
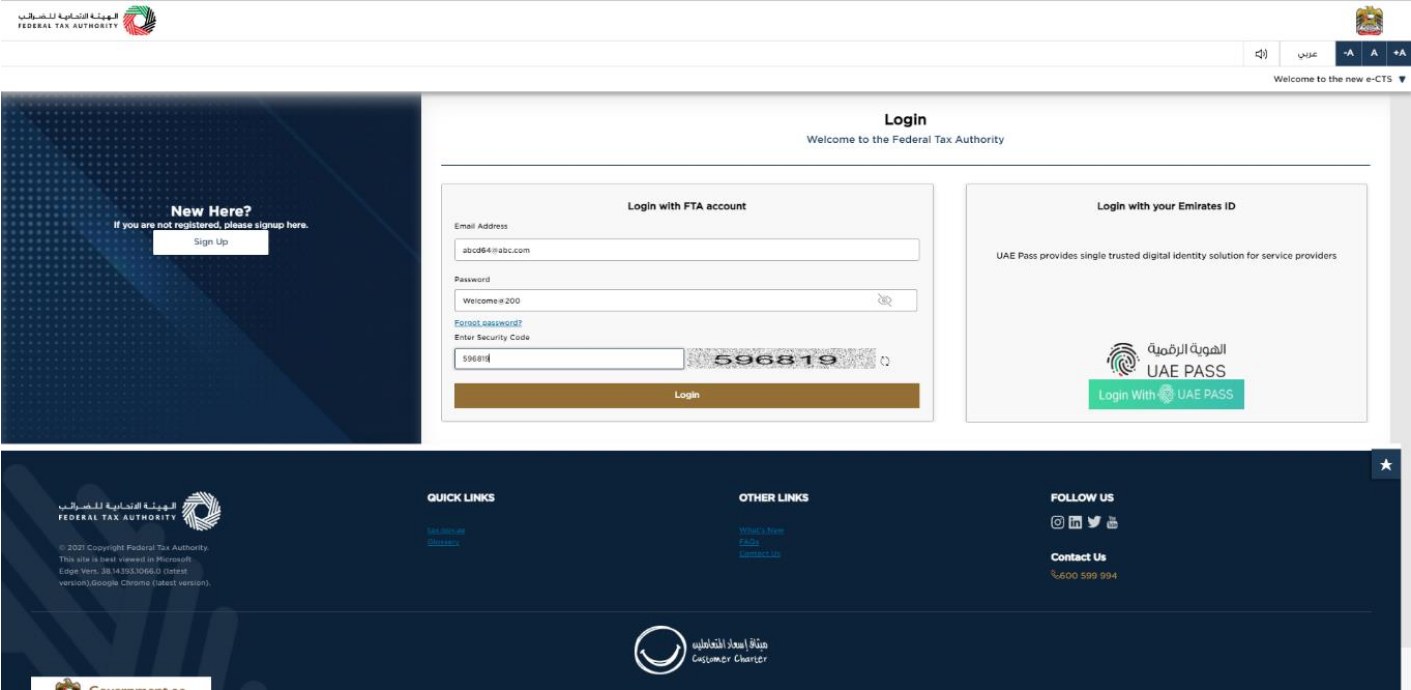
|
|
Step | Action |
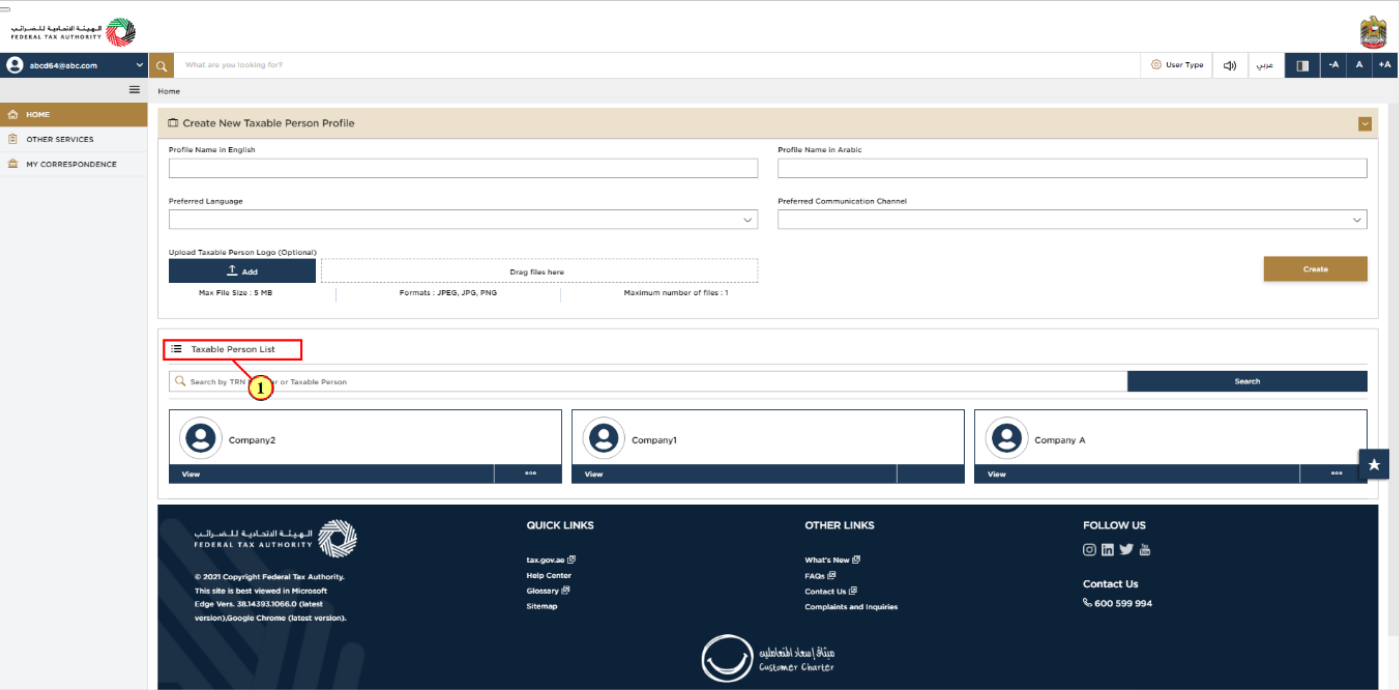
(1) | On successful login, the Taxable Person list screen is displayed. It displays the list of the Taxable Person linked to your EmaraTax user profile. If there are no Taxable Person linked to your user profile, this list will be empty and you would need to create a Taxable Person. |
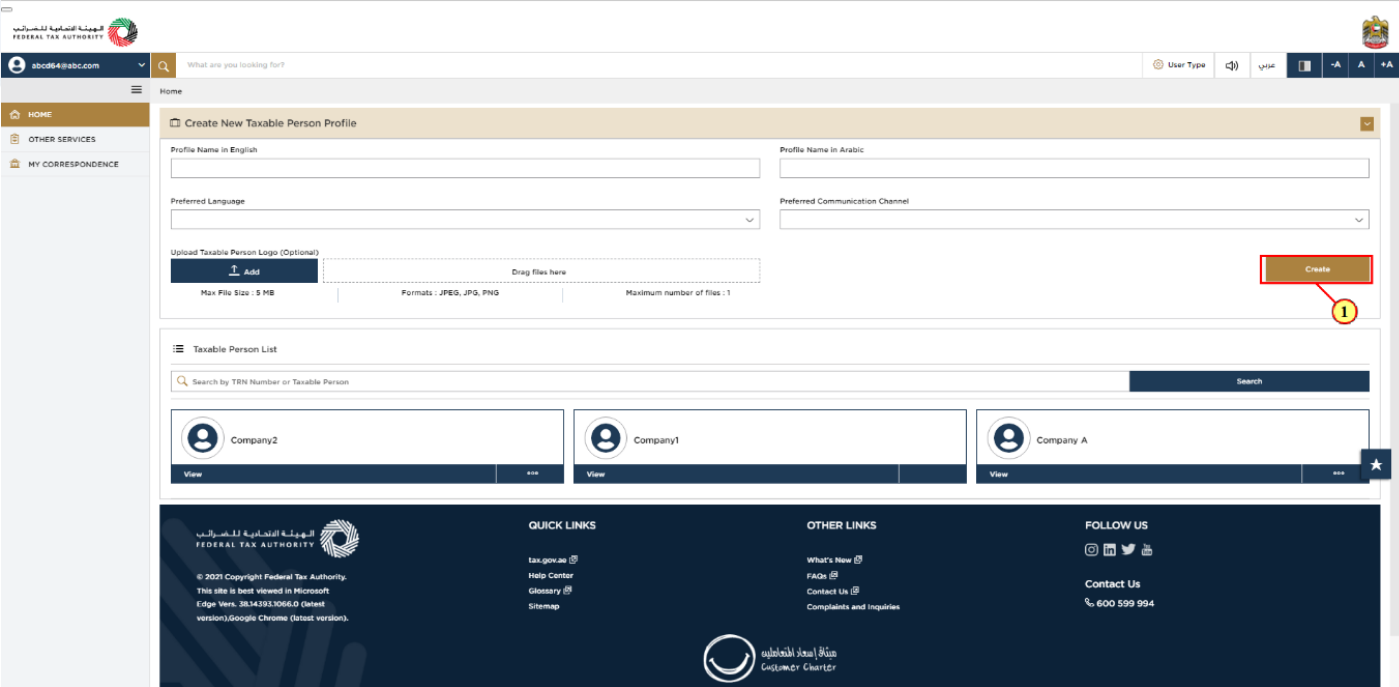
Step | Action |
(1) | To create a new Taxable Person, enter the mandatory details and click 'Create'. The new Taxable Person will be displayed in the list. |
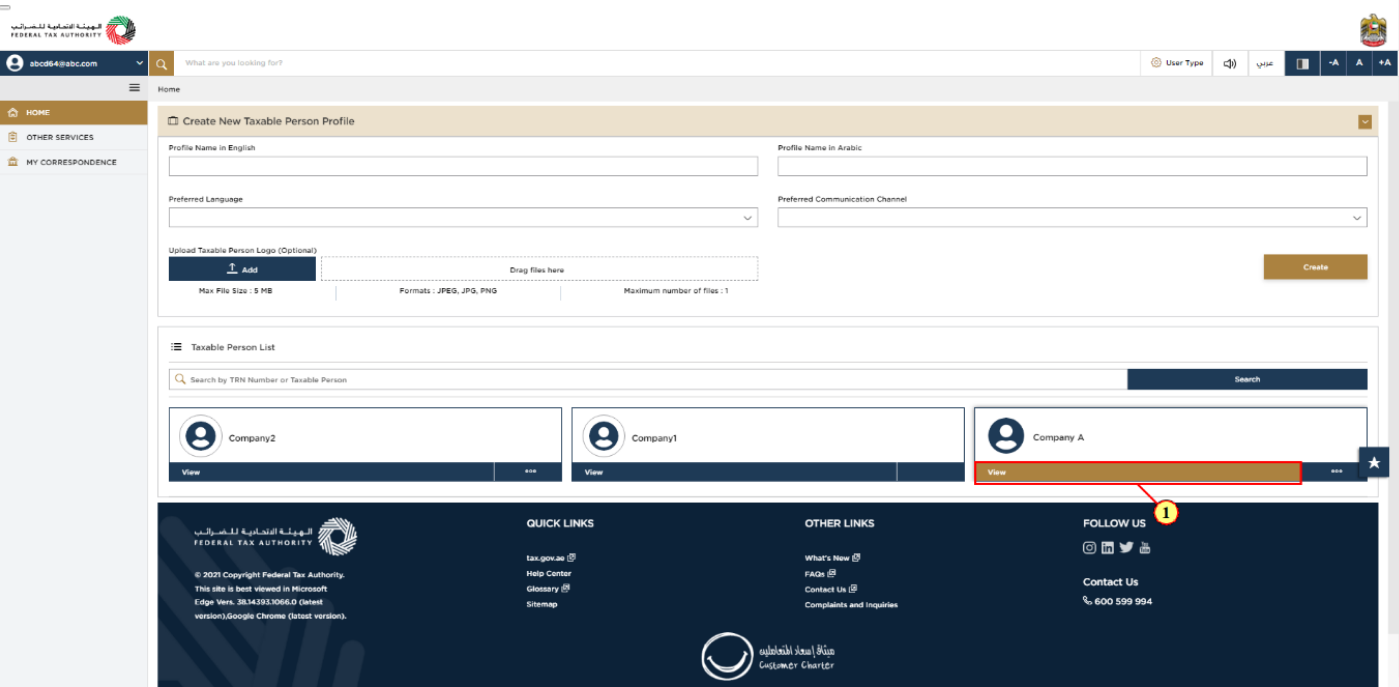
Step | Action |
(1) | Select the Taxable Person from the list and click 'View' to open the dashboard. |
6. EmaraTax Taxable person dashboard
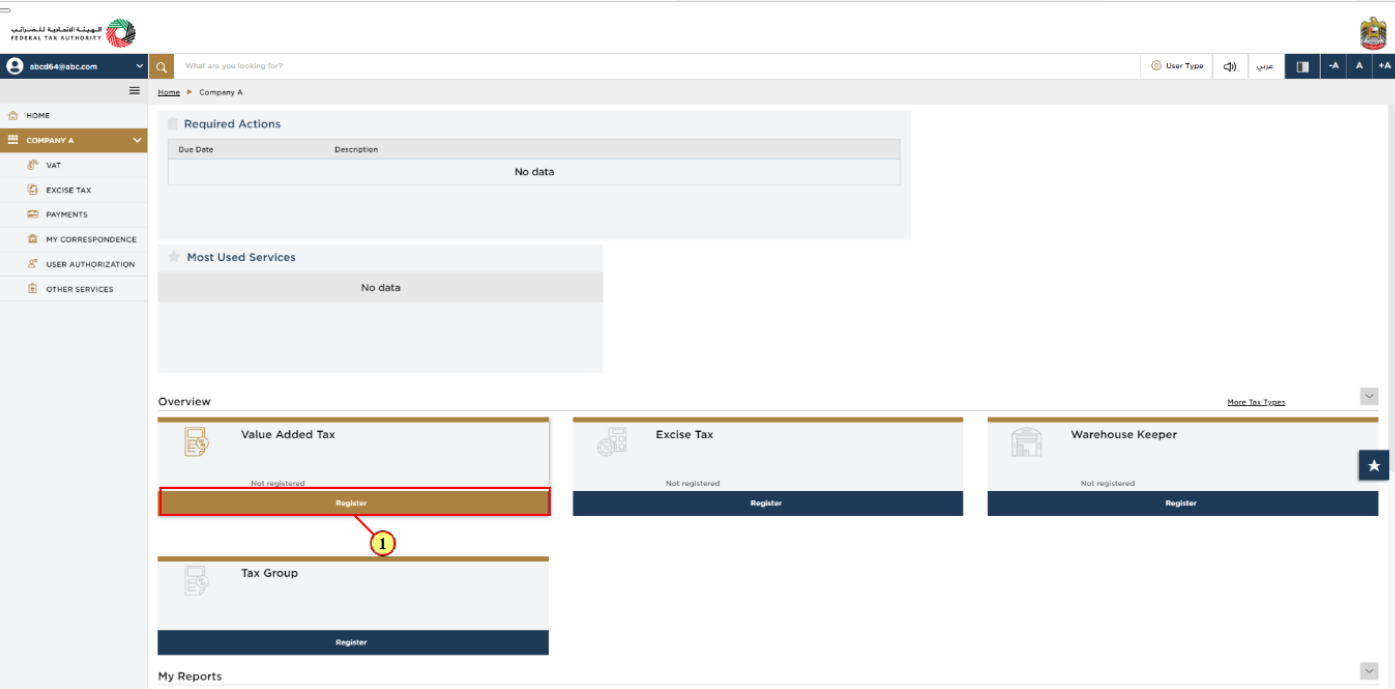
Step | Action |
(1) | Click ‘Register’ on the VAT tile with in the Taxable Person dashboard to initiate the VAT registration application. |
7. Guidelines and Instructions
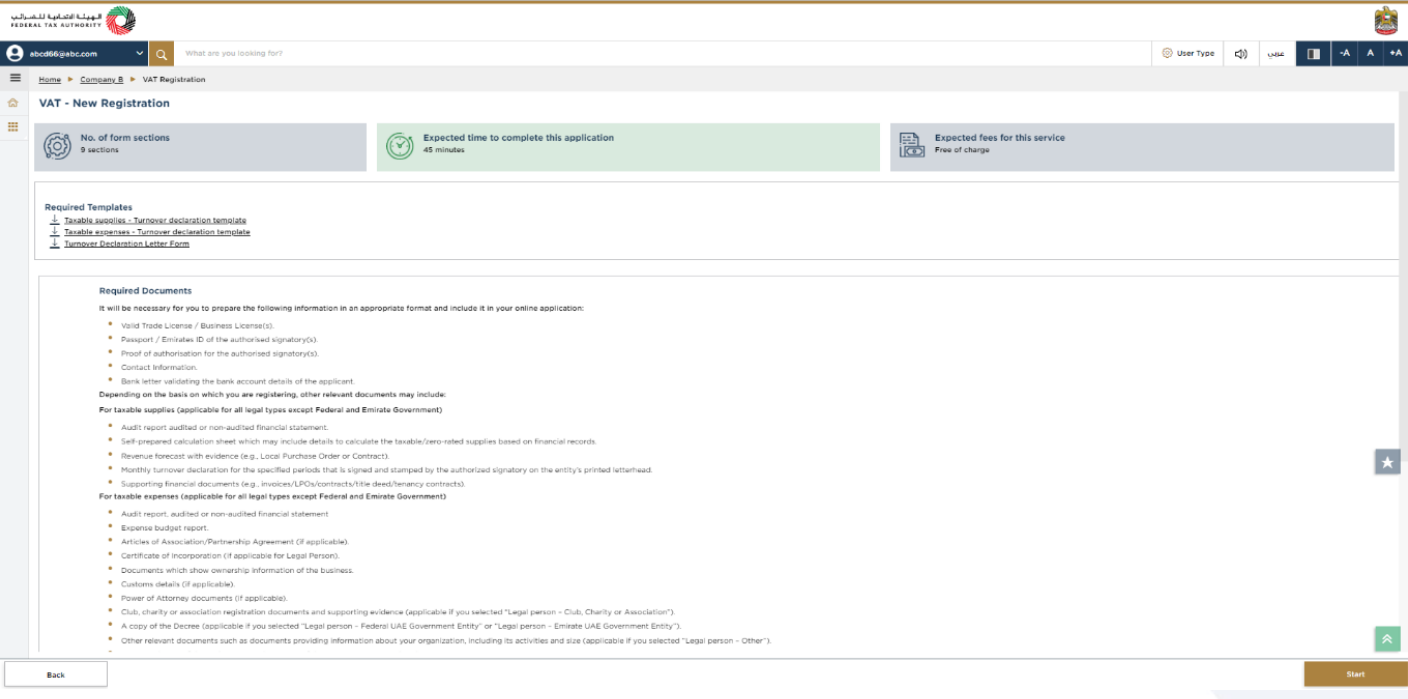
| The 'guidelines and instructions' page is designed to help you understand certain important requirements relating to VAT registration, in the UAE. It also provides guidance on what information you should have in hand when you are submitting the VAT registration application. |
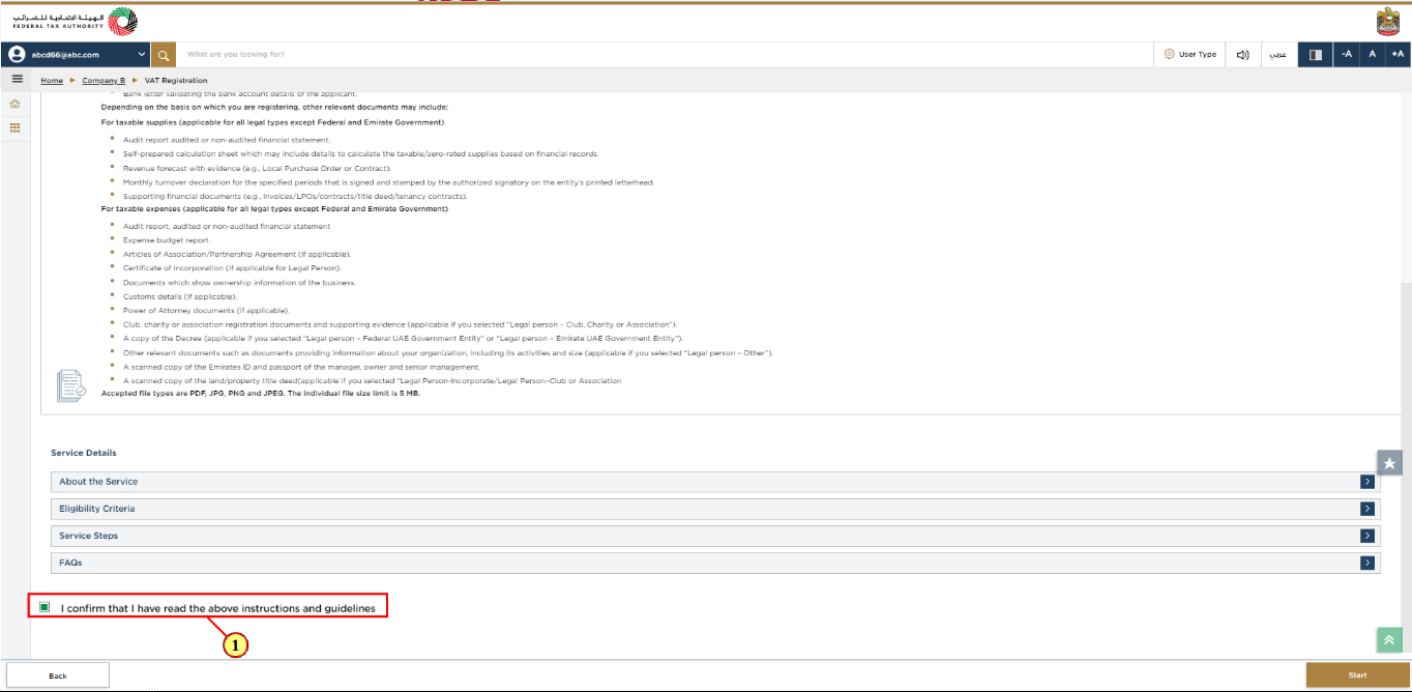
Step | Action |
(1) | A screen will appear with guidelines and instructions. Read the guidelines and instructions for VAT Registration and mark the checkbox to confirm. |
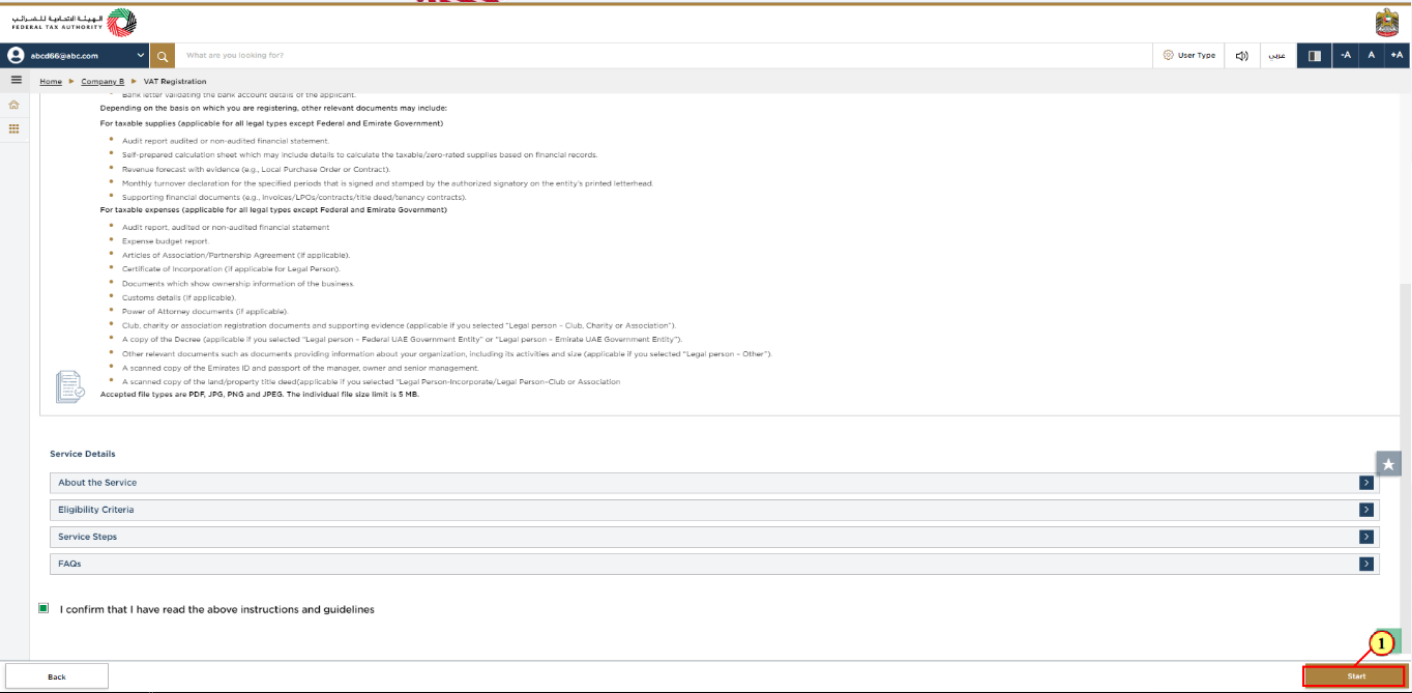
Step | Action |
(1) | Click ‘Start’ to initiate the VAT Registration application. |
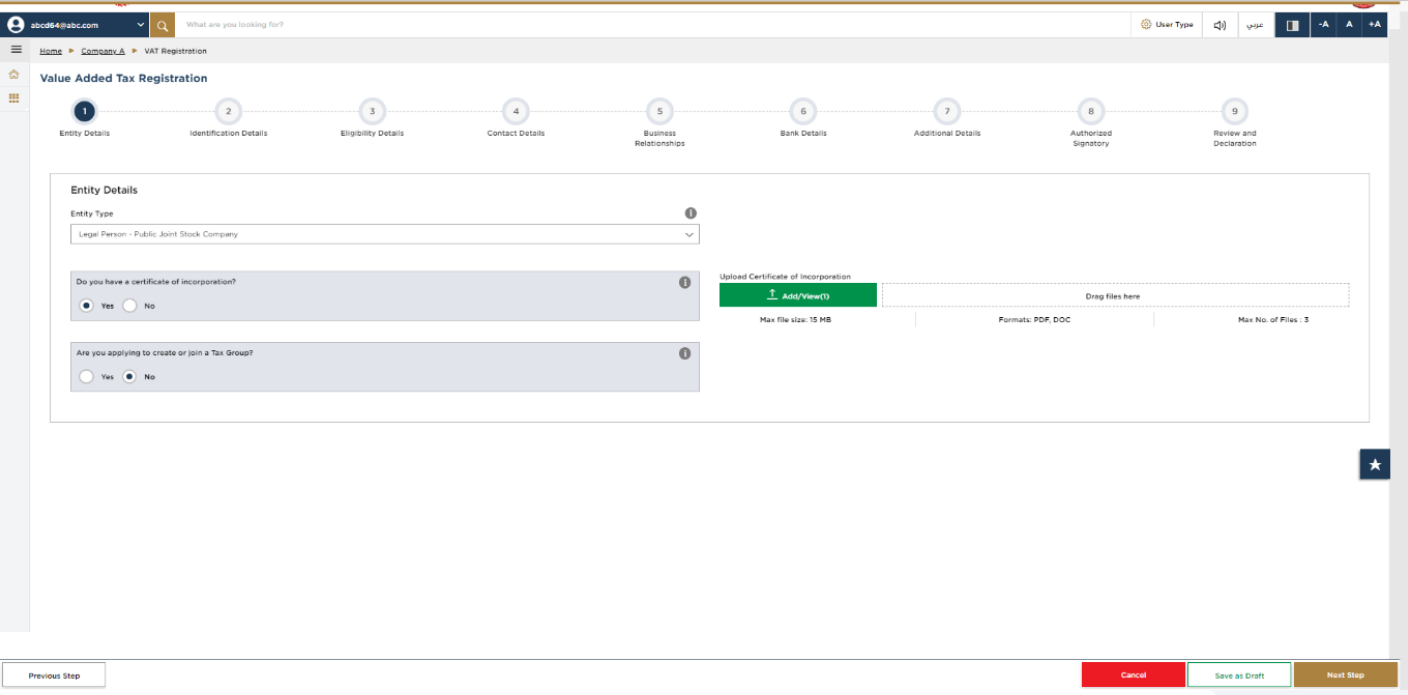
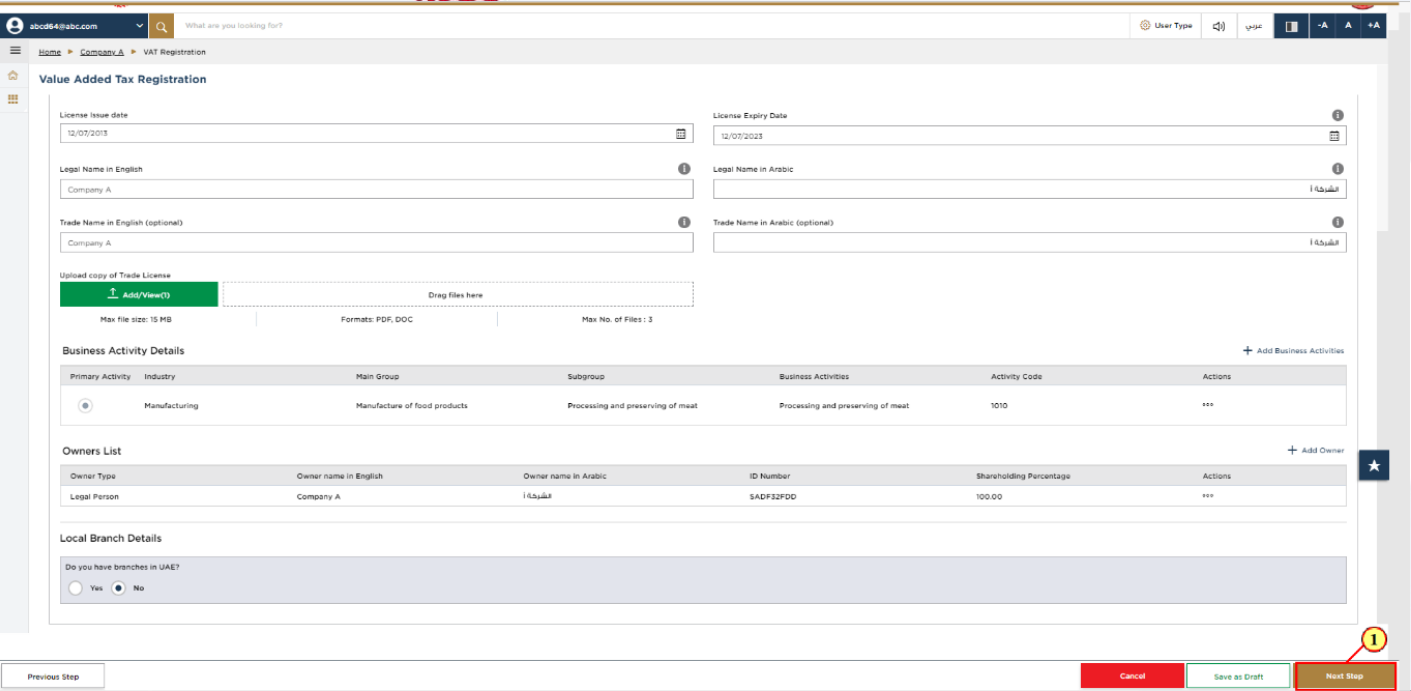
8. Entity Details Section
|
|
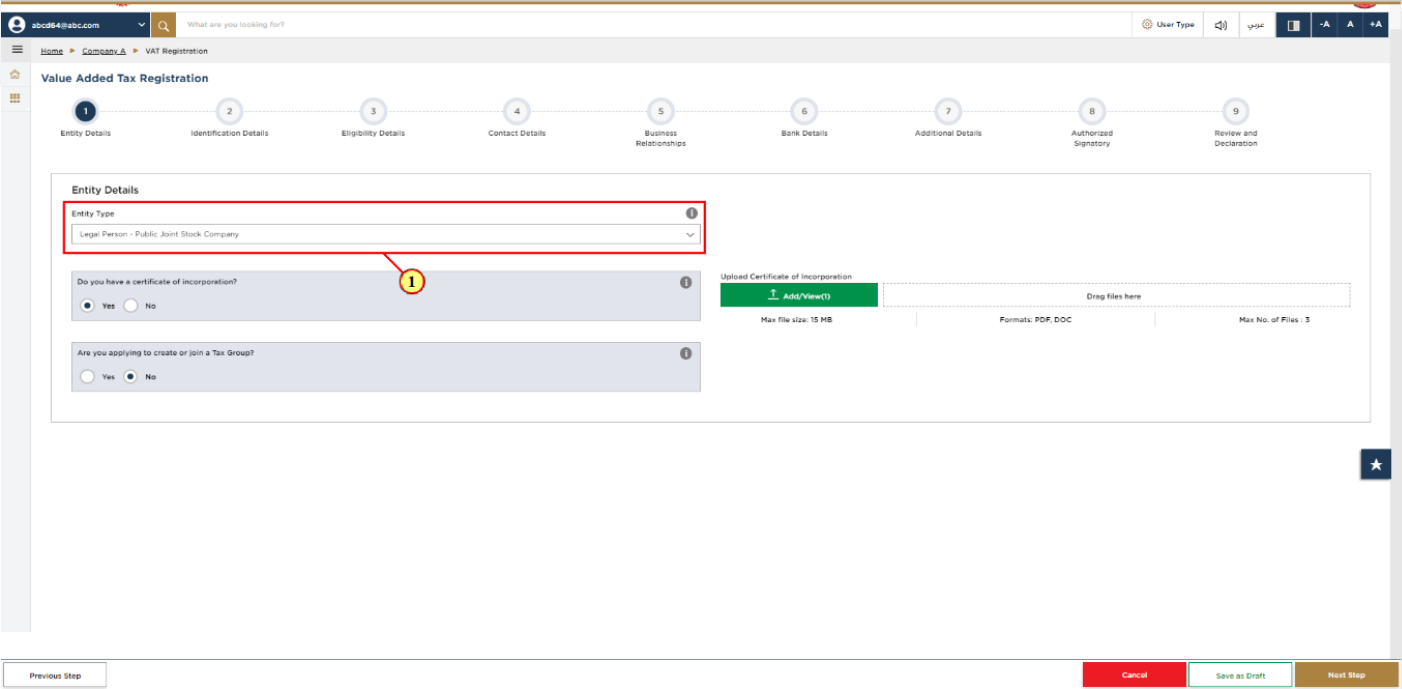
Step | Action |
(1) | Select the Entity Type of your business from the list in the entity details section. Note that the input fields in this section may vary based on the entity type selected. |

| You will be able to see the following list of entity types in the application:
|

Step | Action |
(1) | You may click on ‘Save as draft’ to save your application and return to continue working on your application later. |
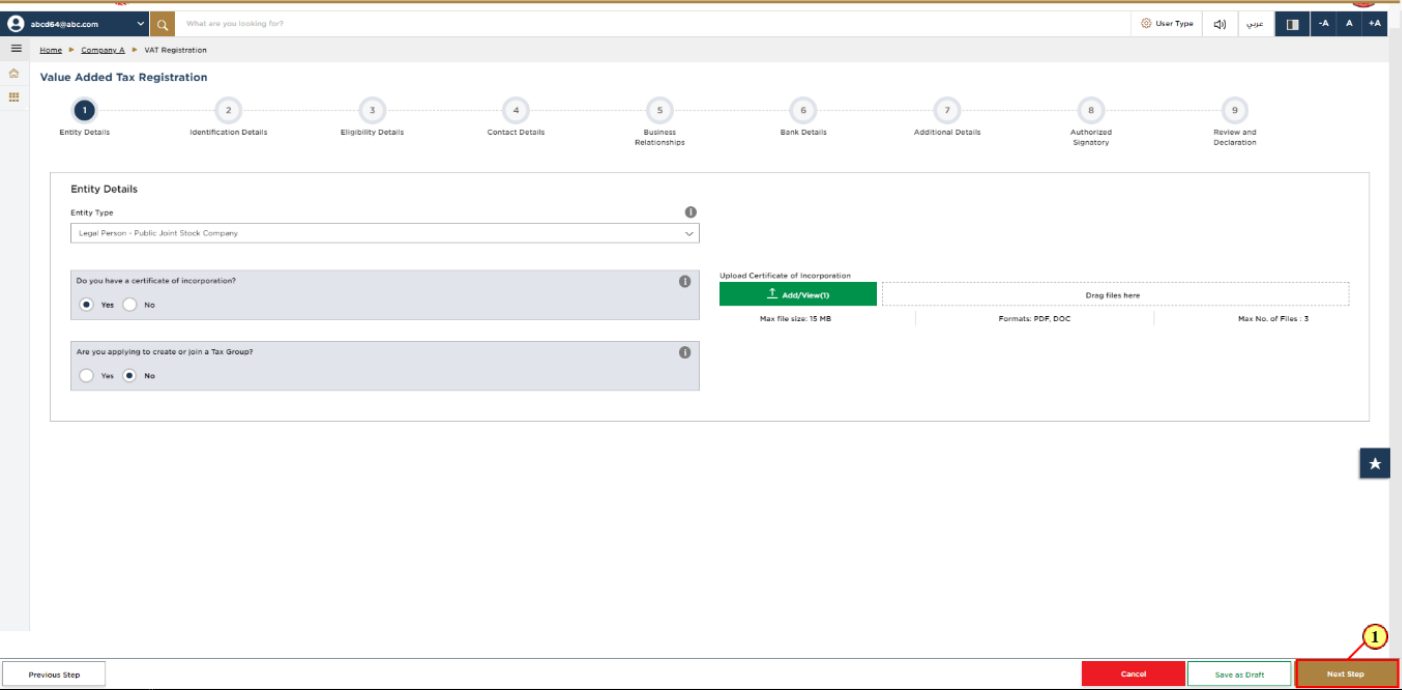
Step | Action |
(1) | After completing all the mandatory fields, click ‘Next Step’ to save and proceed to the 'Identification Details' section. |
9. Identification Details
10. Main License Details
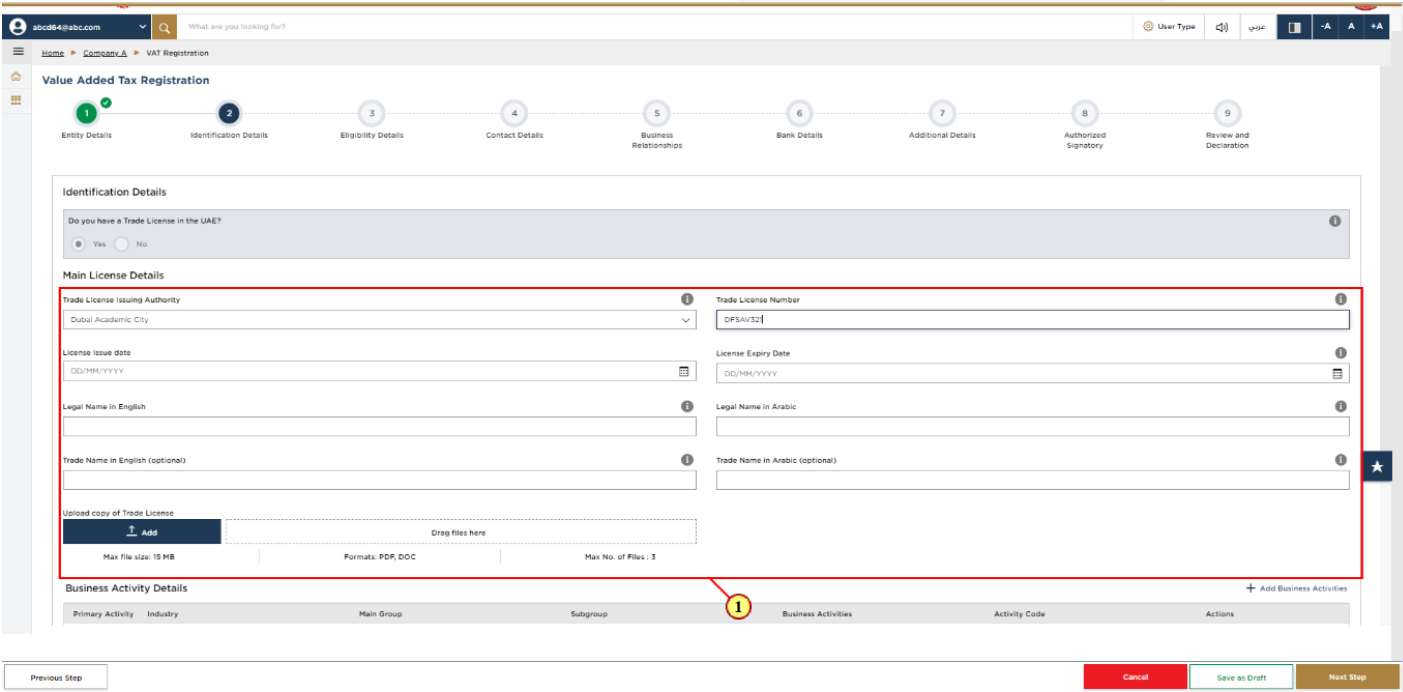
Step | Action |
(1) | Depending on the ‘Entity Type’ selected, you are required to provide the main trade license details in the identification details section. |
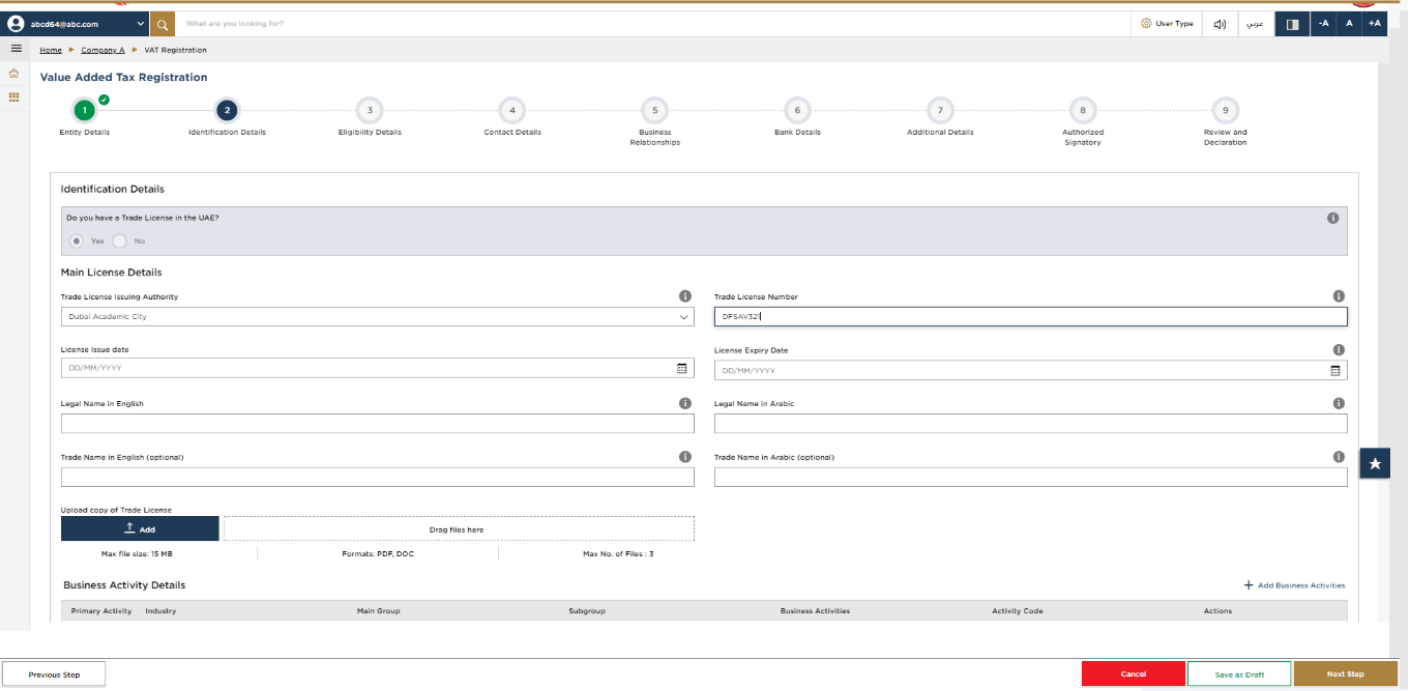
| Trade License is not applicable for the below entity types:
|
11. Business Activities
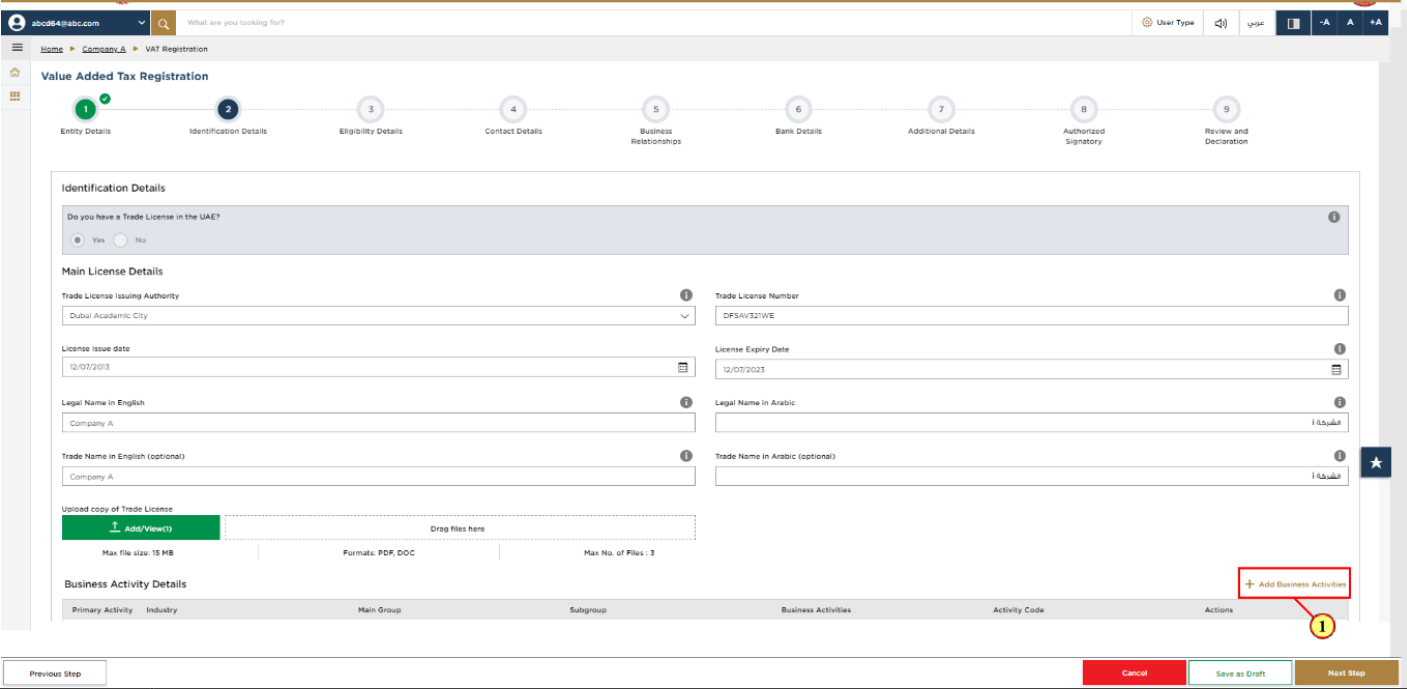
Step | Action |
(1) | Click on 'Add Business Activities' to enter all the business activity information associated to the trade license. |
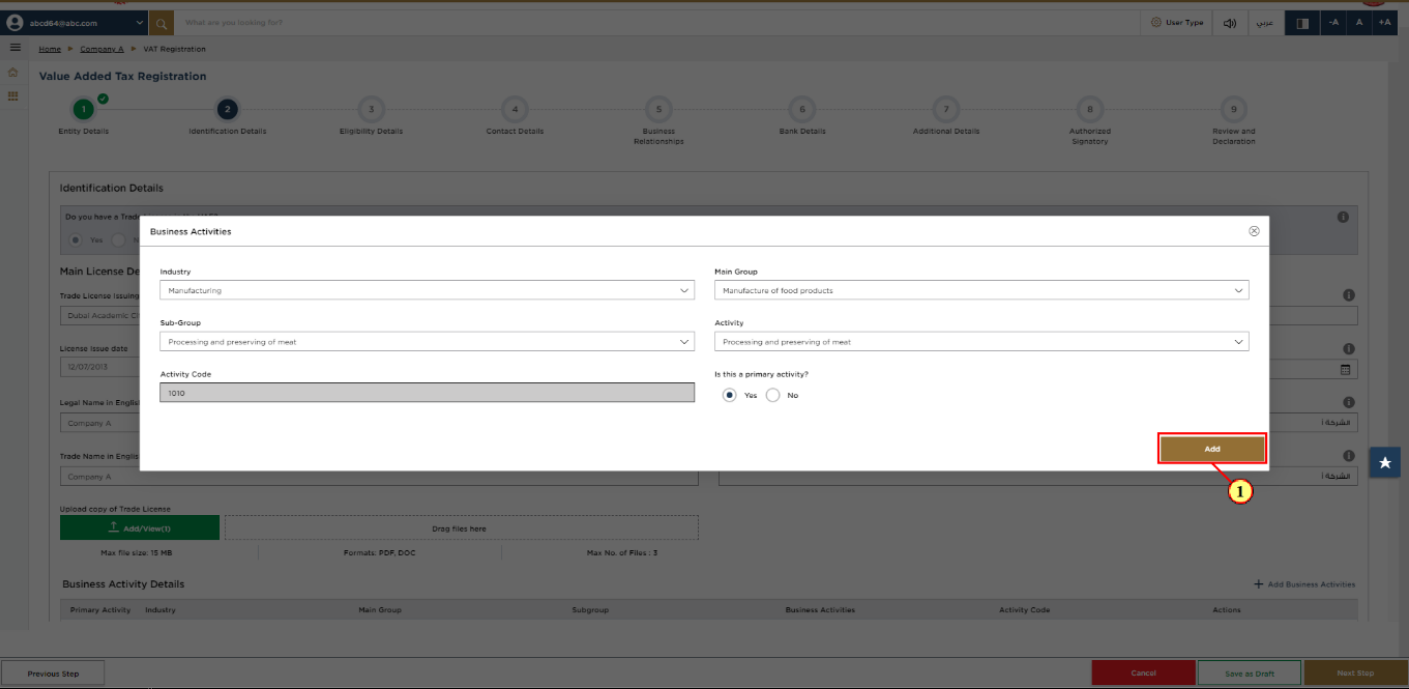
Step | Action |
(1) | Enter the mandatory business activity information and click on Add. |
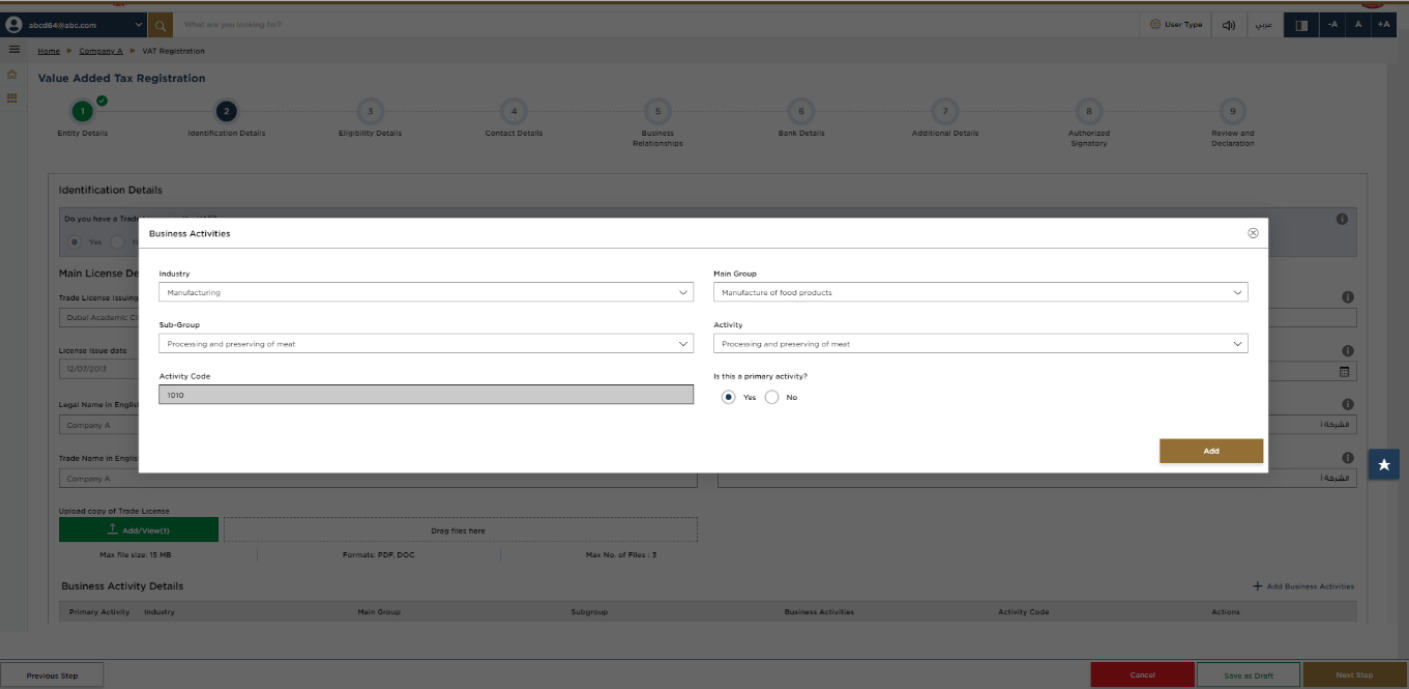
Step | Action |
(1) | Ensure that the information about all your business activities is included. The activity code will get populated in the screen. |
12. Owner Details
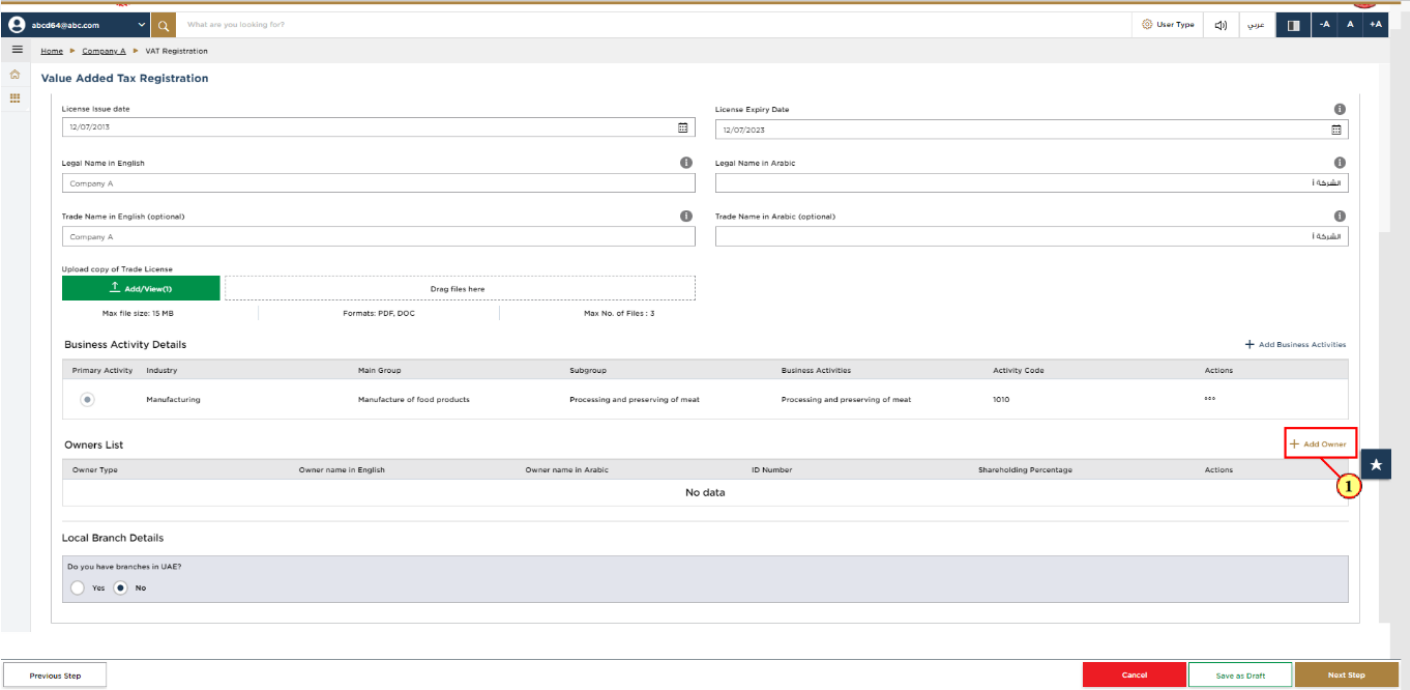
Step | Action |
(1) | Click on 'Add Owners' to enter all the owners’ associated to the trade license. |
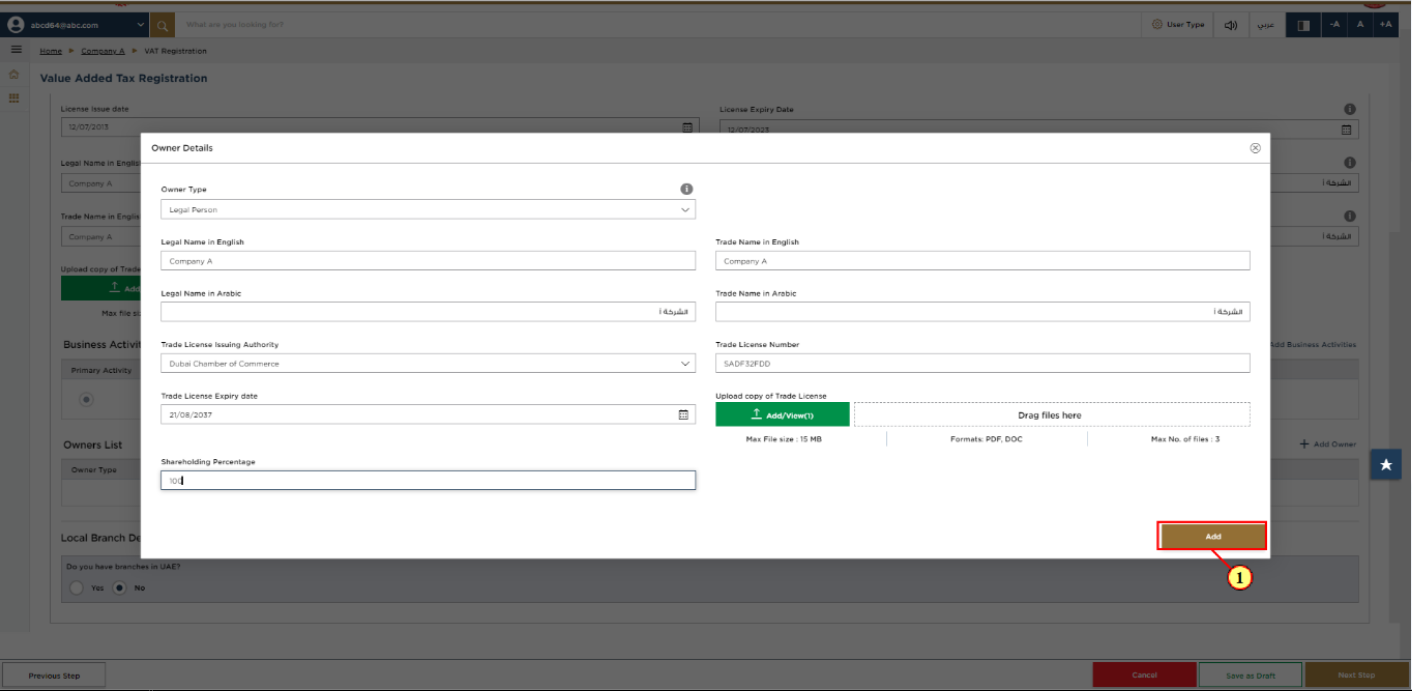
Step | Action |
(1) | Enter the mandatory owner information and click on Add. |
13. Branch Details
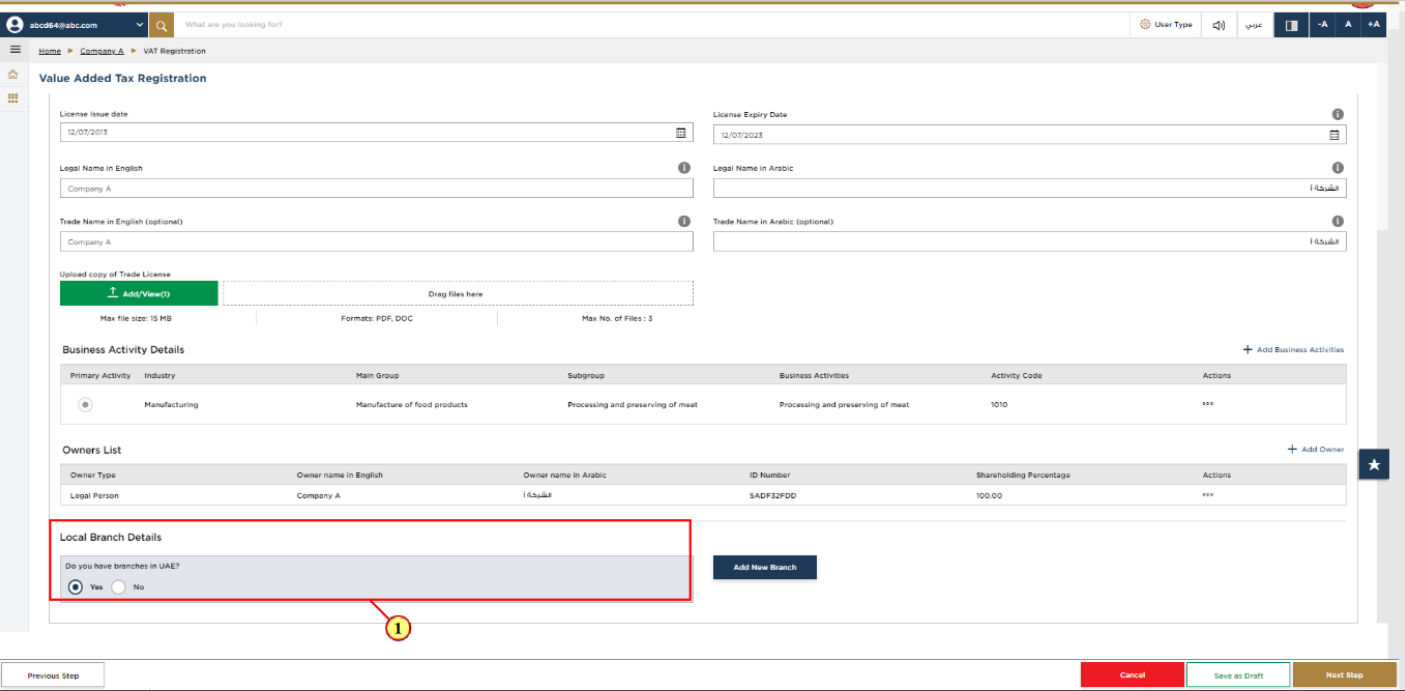
Step | Action |
(1) | Select ‘Yes’, if you have one or more branches, and add the local branch details. For each branch, enter the trade license details and associated business activities and owners list. |
| The registration will be in the name of head office meeting the relevant criteria. Registration will not be performed in the name of Branch. Even if you are operating via branches in more than one Emirate, only one VAT registration is required. |
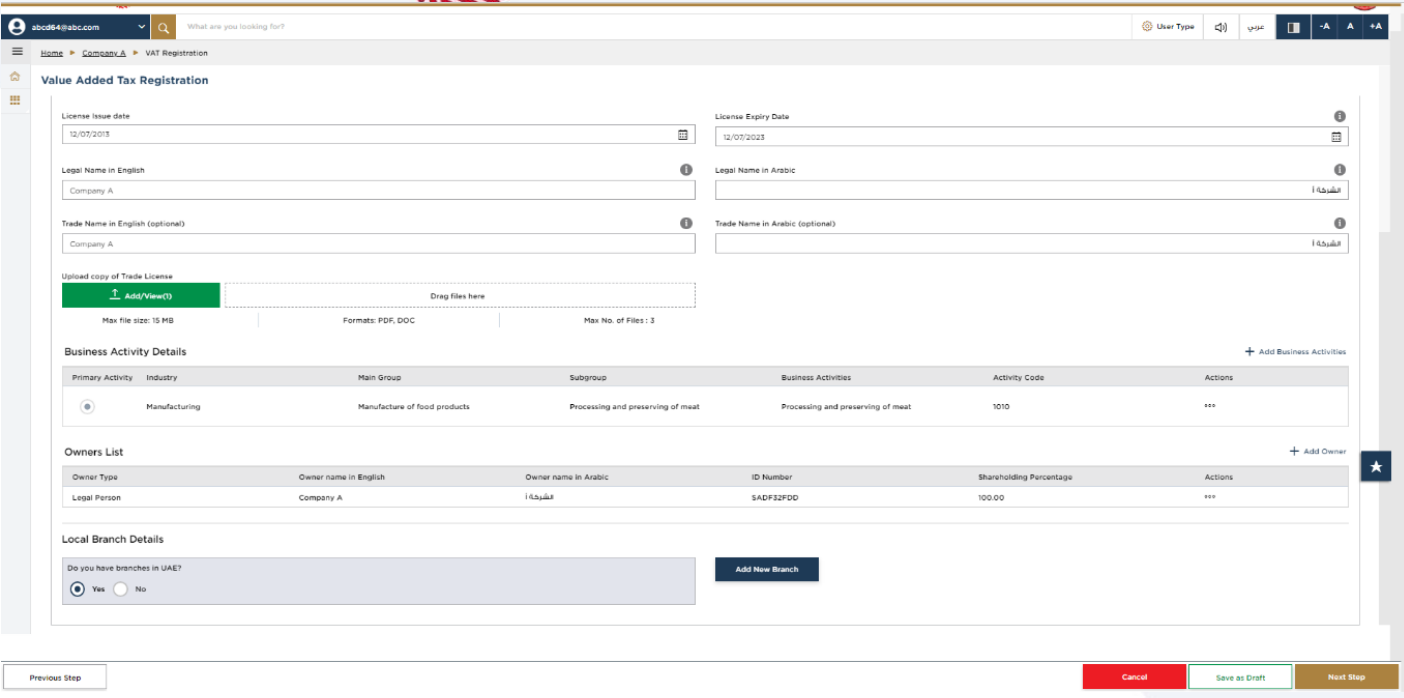
Step | Action |
(1) | After completing all mandatory fields, click ‘Next Step’ to save and proceed to the 'Eligibility Details' section |
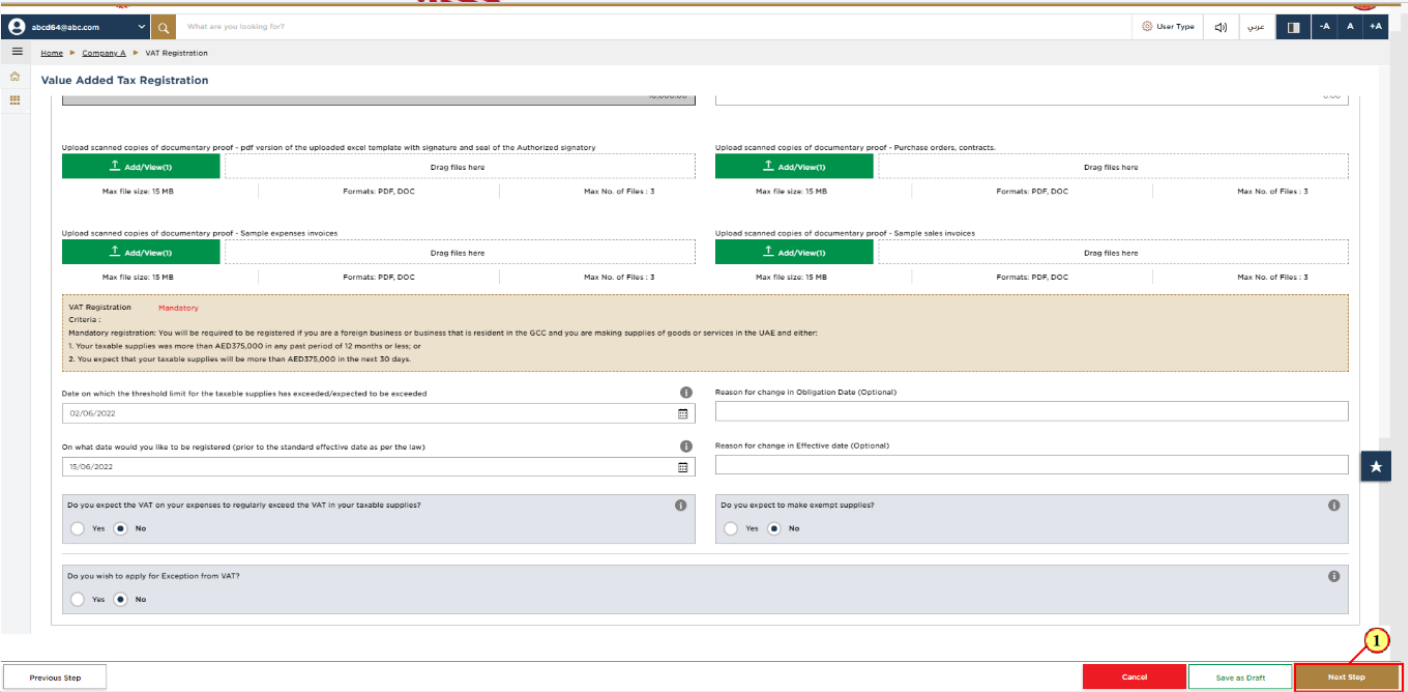
14. Eligibility Details
15. Taxable supplies and Taxable expenses
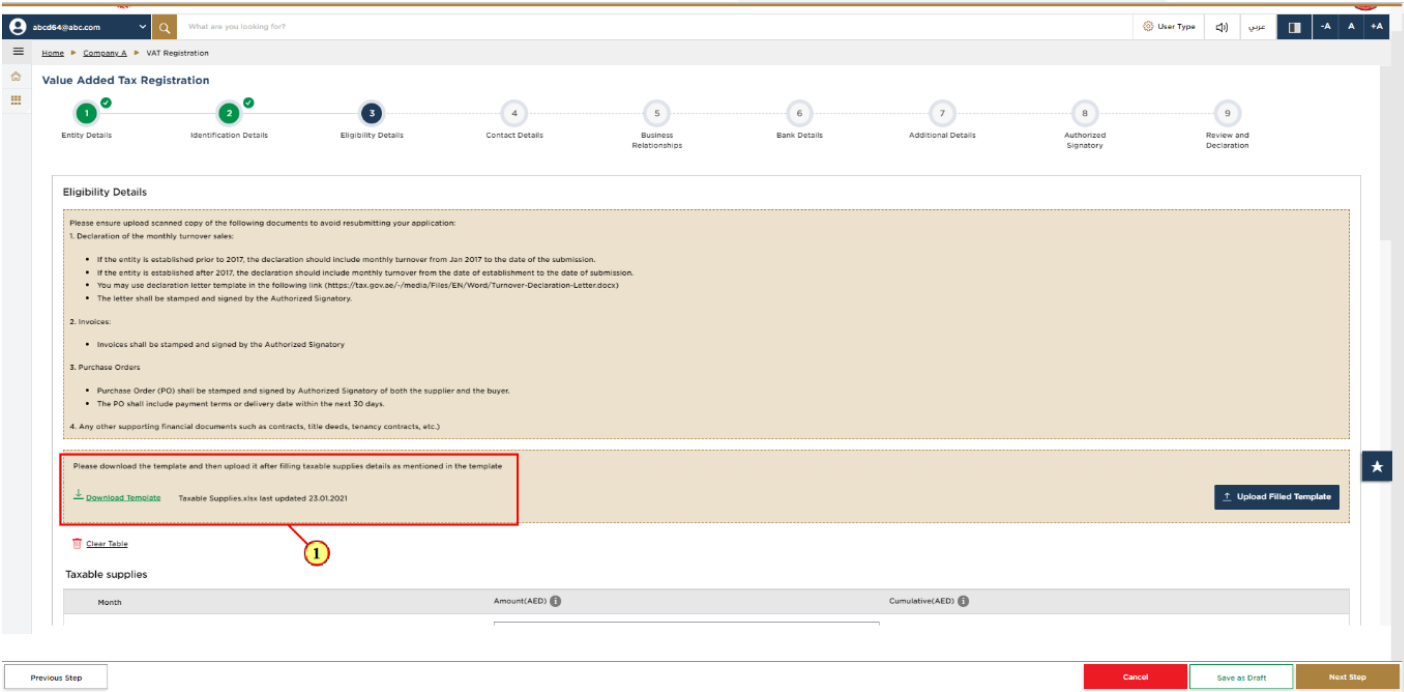
Step | Action |
(1) | There are two options to enter your taxable supplies and Taxable expenses.
OR |
| If the ‘VAT registration criteria’ is determined as ’Mandatory’ or ‘Voluntary’, you are eligible for VAT registration. If the ‘VAT registration criteria’ is determined as ‘Not applicable’, you are not eligible for VAT registration. |
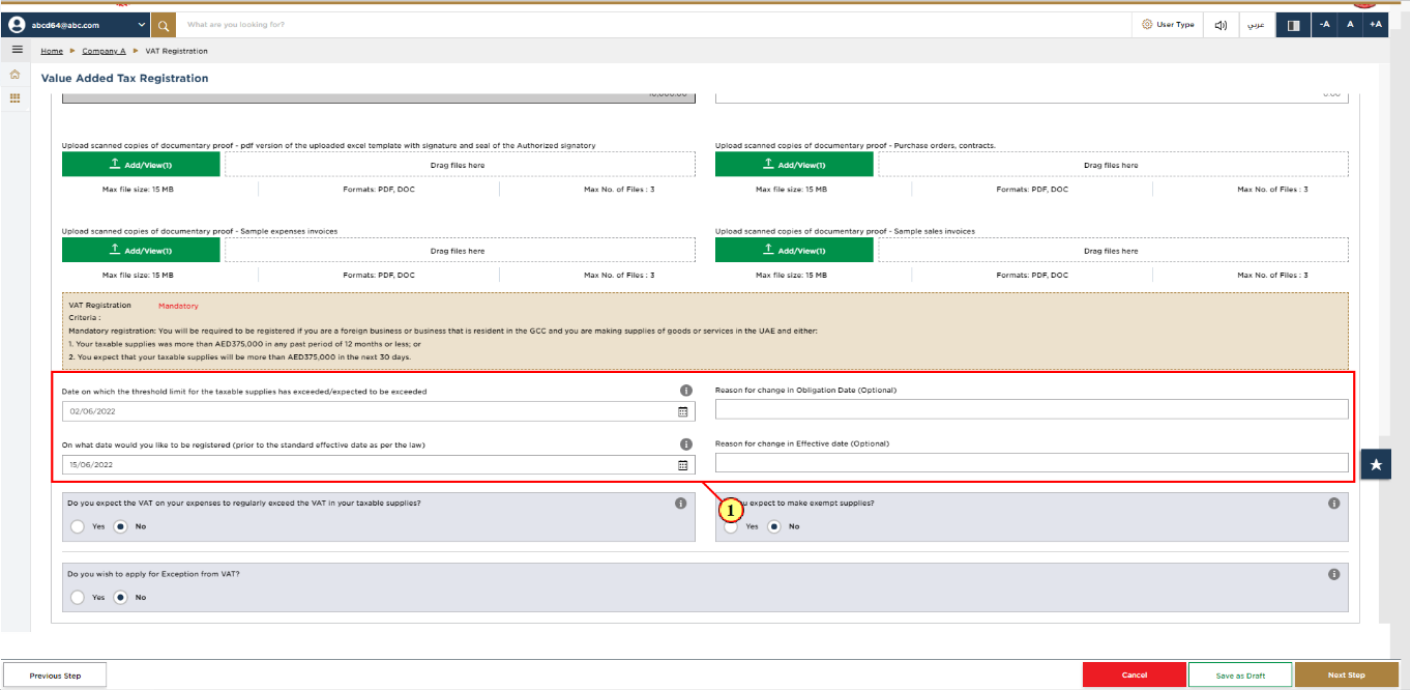
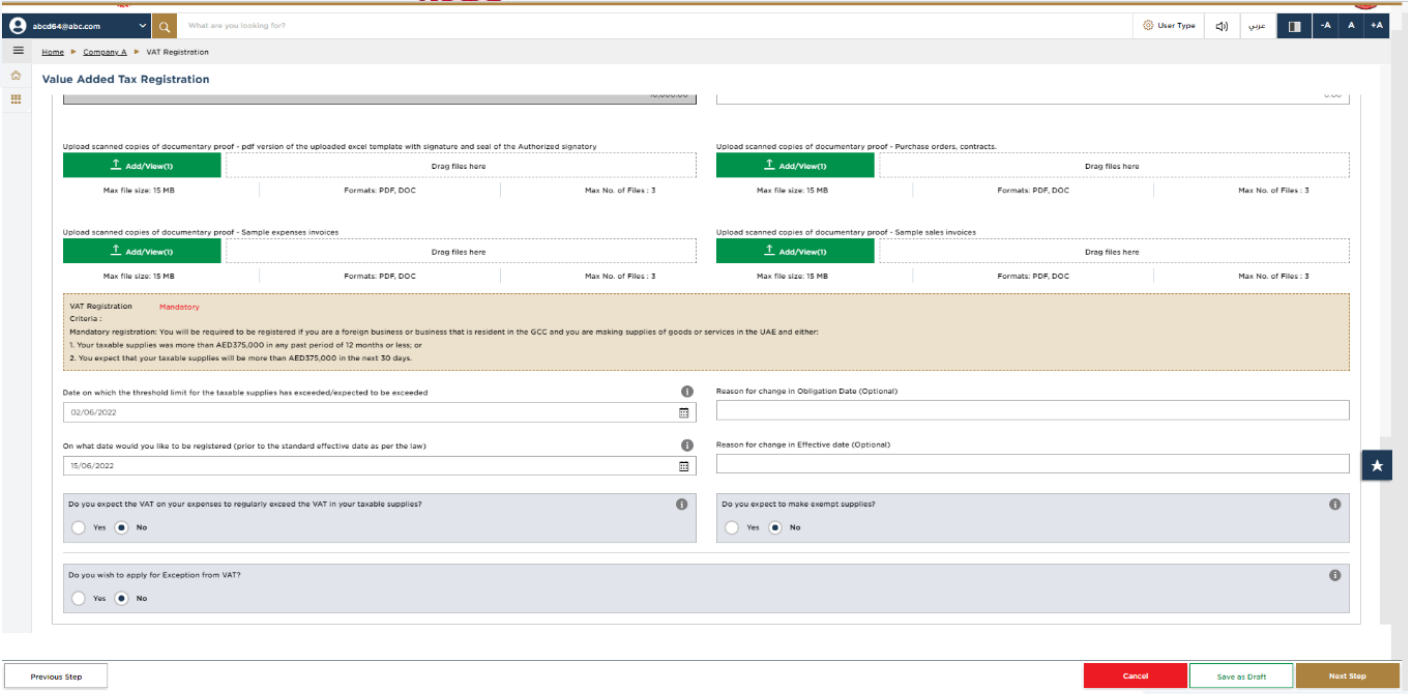
Step | Action |
(1) |
|
Step | Action |
(1) | After completing all mandatory fields, click ‘Next Step’ to save and proceed to the 'Contact Details' section. |
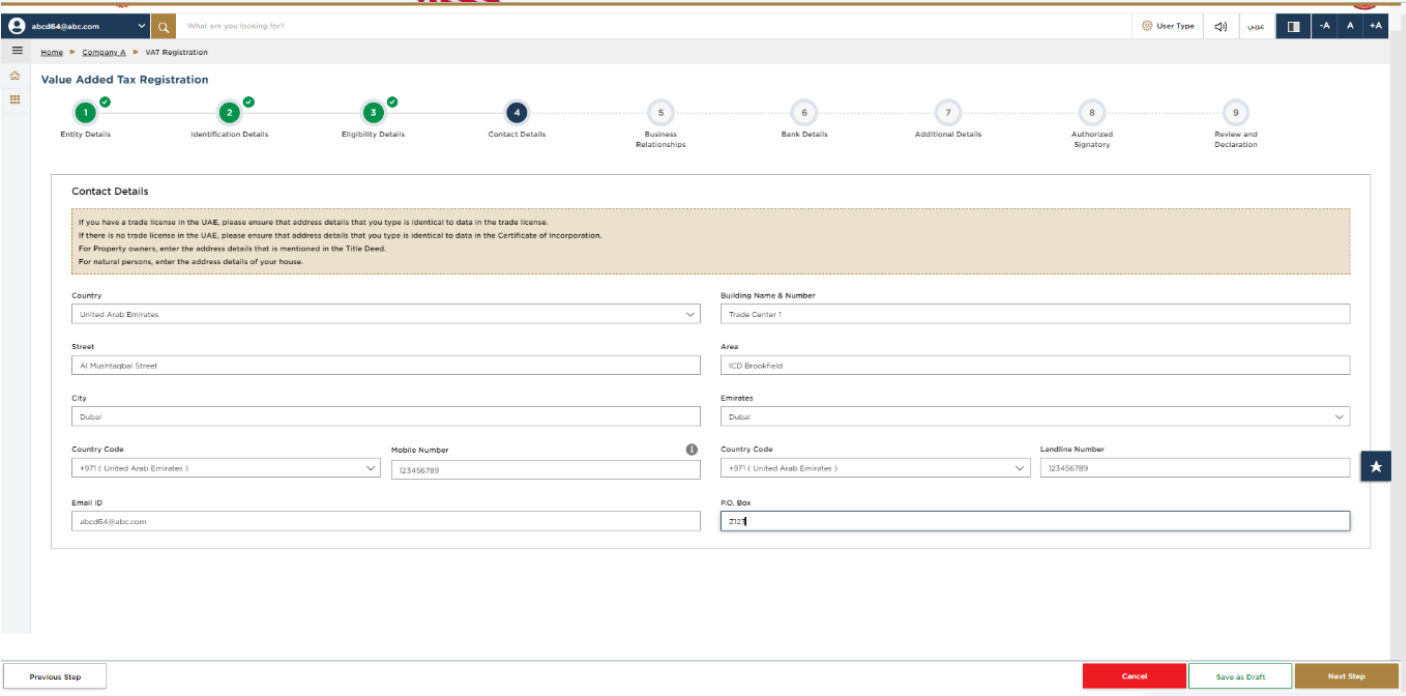
16. Contact Details
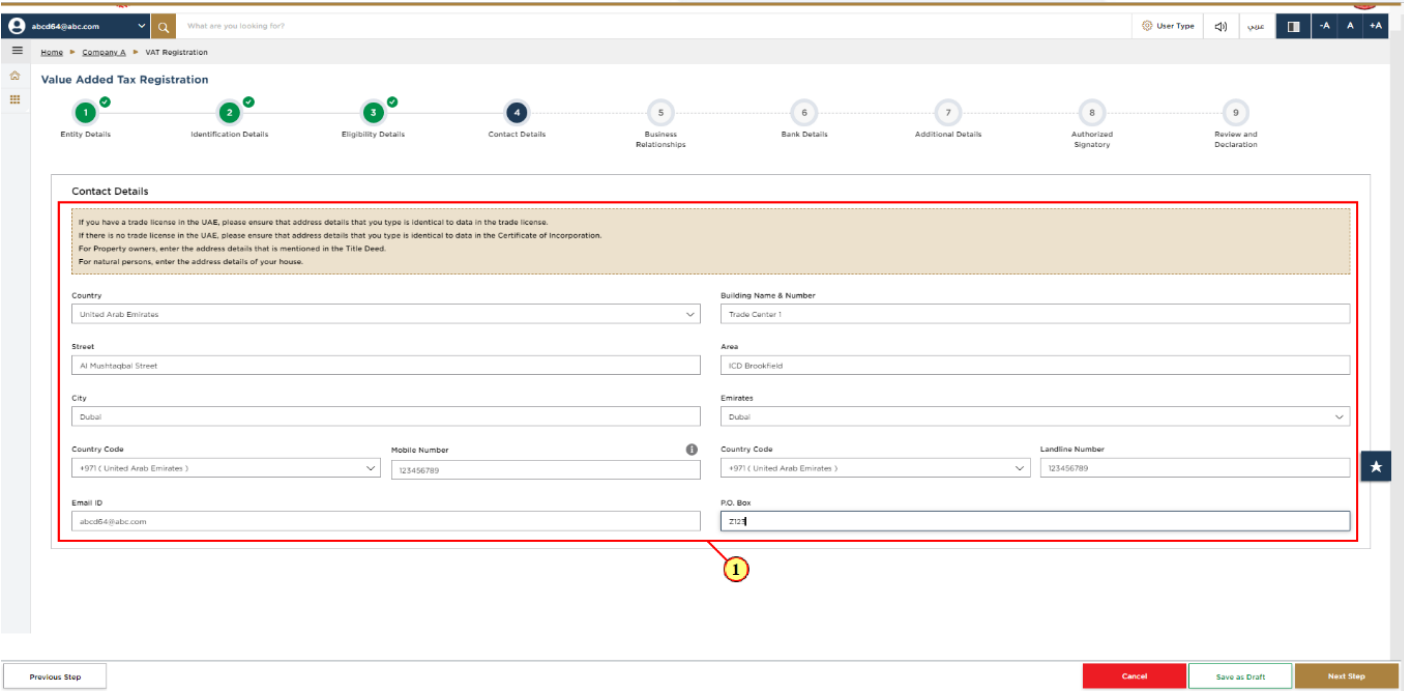
Step | Action |
(1) | Enter the registered address details of the business. |
|
|

Step | Action |
(1) | After completing all mandatory fields, click ‘Next Step’ to save and proceed to the 'Business Relationships' section. |
17. Business Relationships
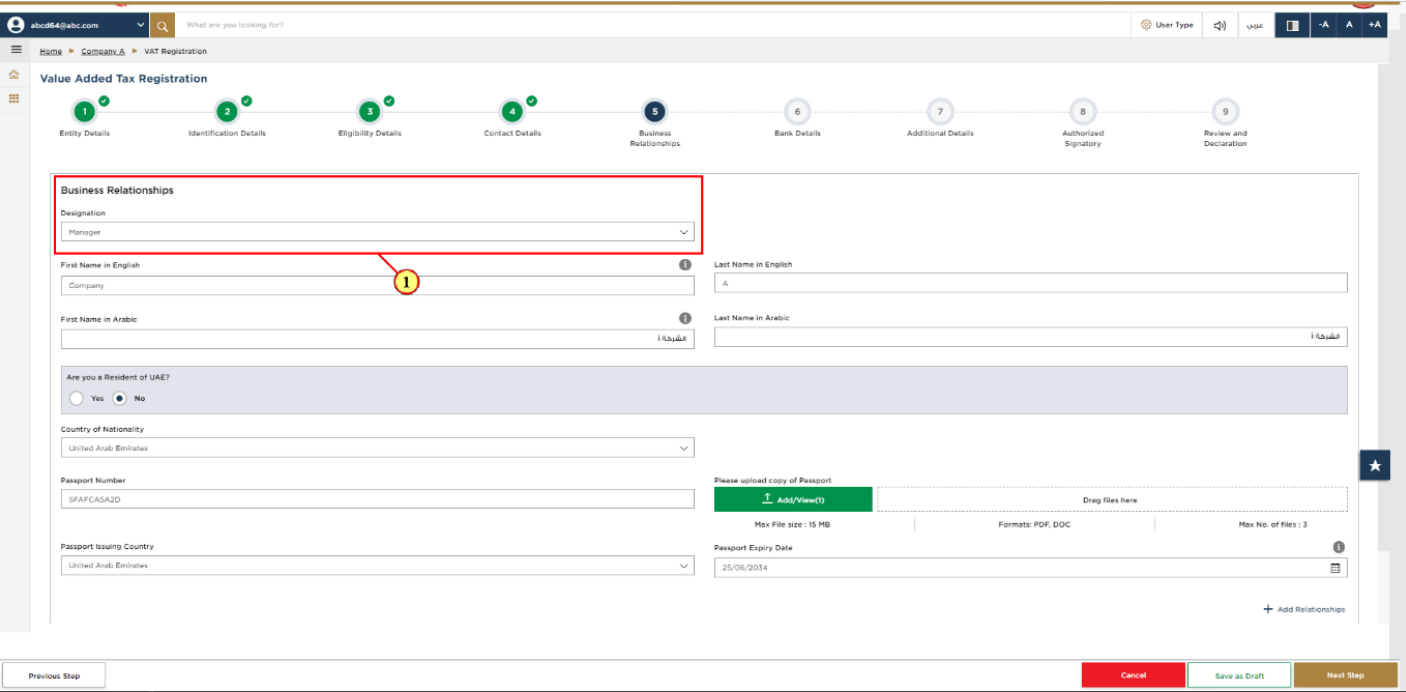
Step | Action |
(1) | Enter the details of the Manager OR CEO. |
18. Add More Relationships
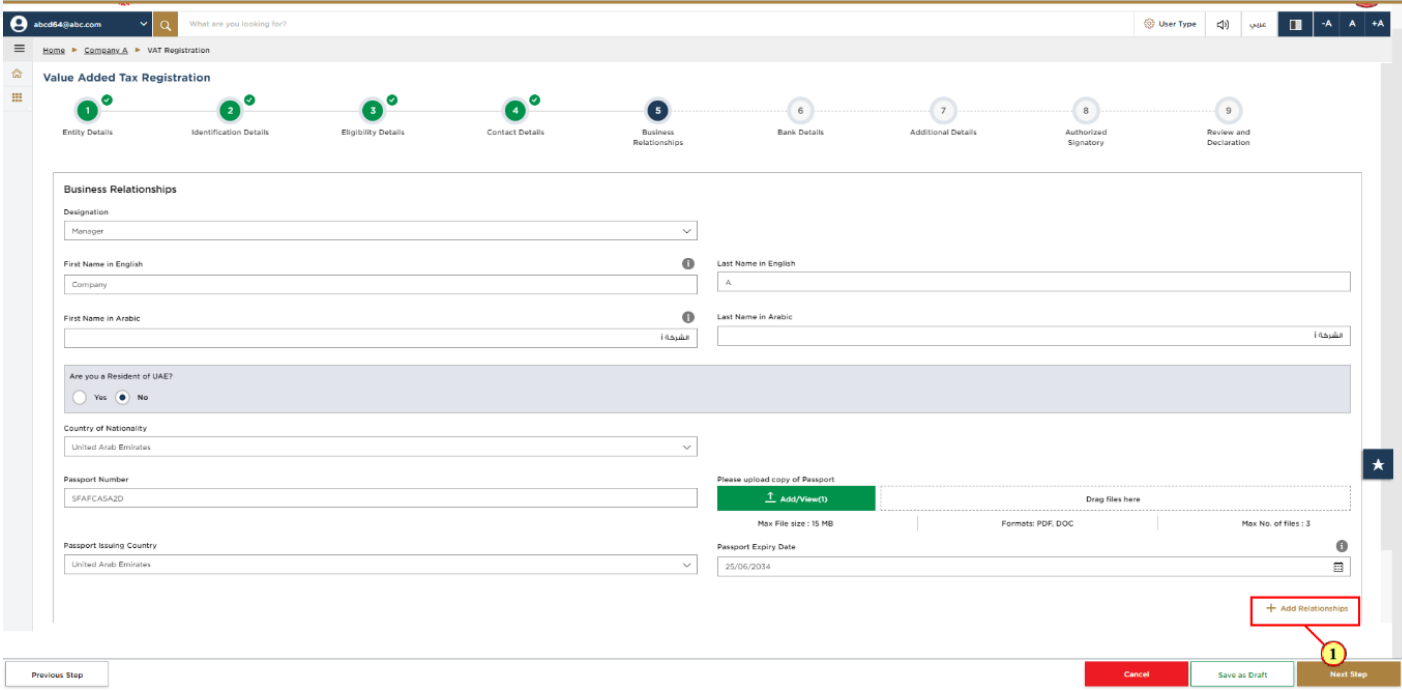
Step | Action |
(1) | Click 'Add Relationships' to add more relationship details, this is an optional field. |
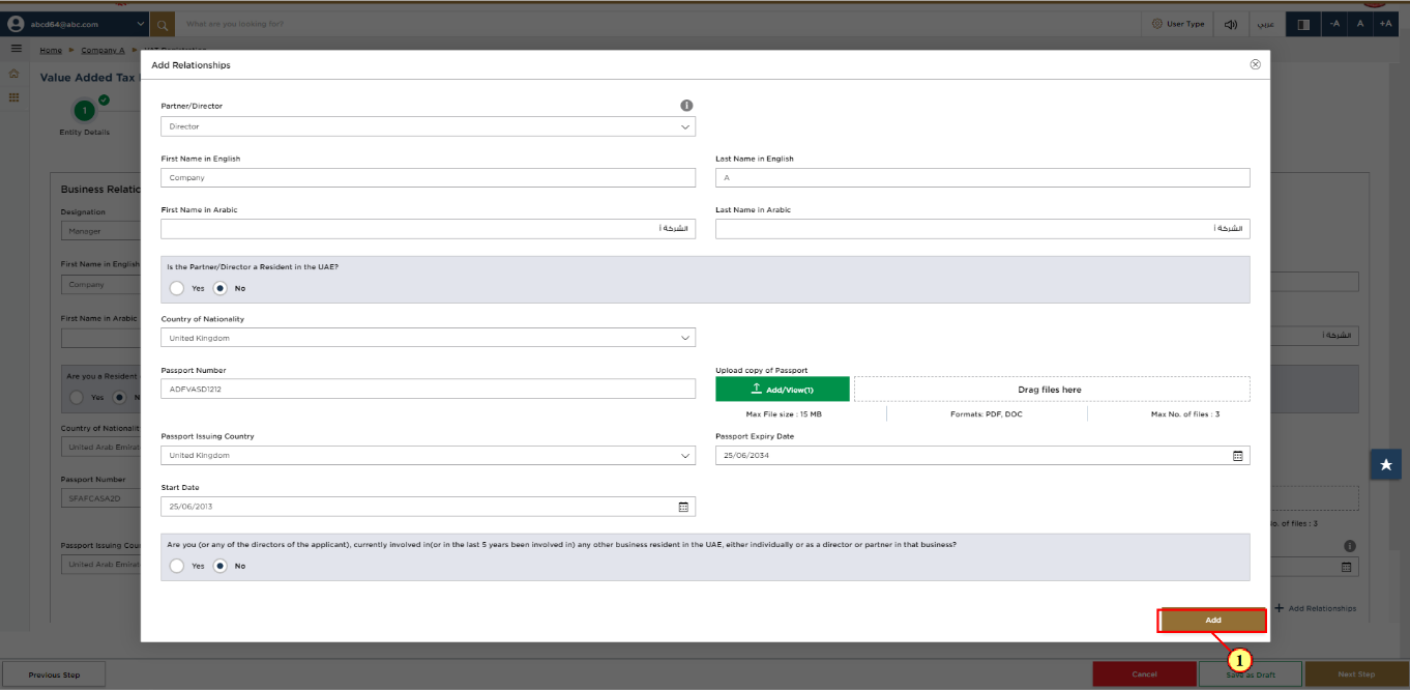
Step | Action |
(1) | Enter Partner or Director details and click 'Add'. |
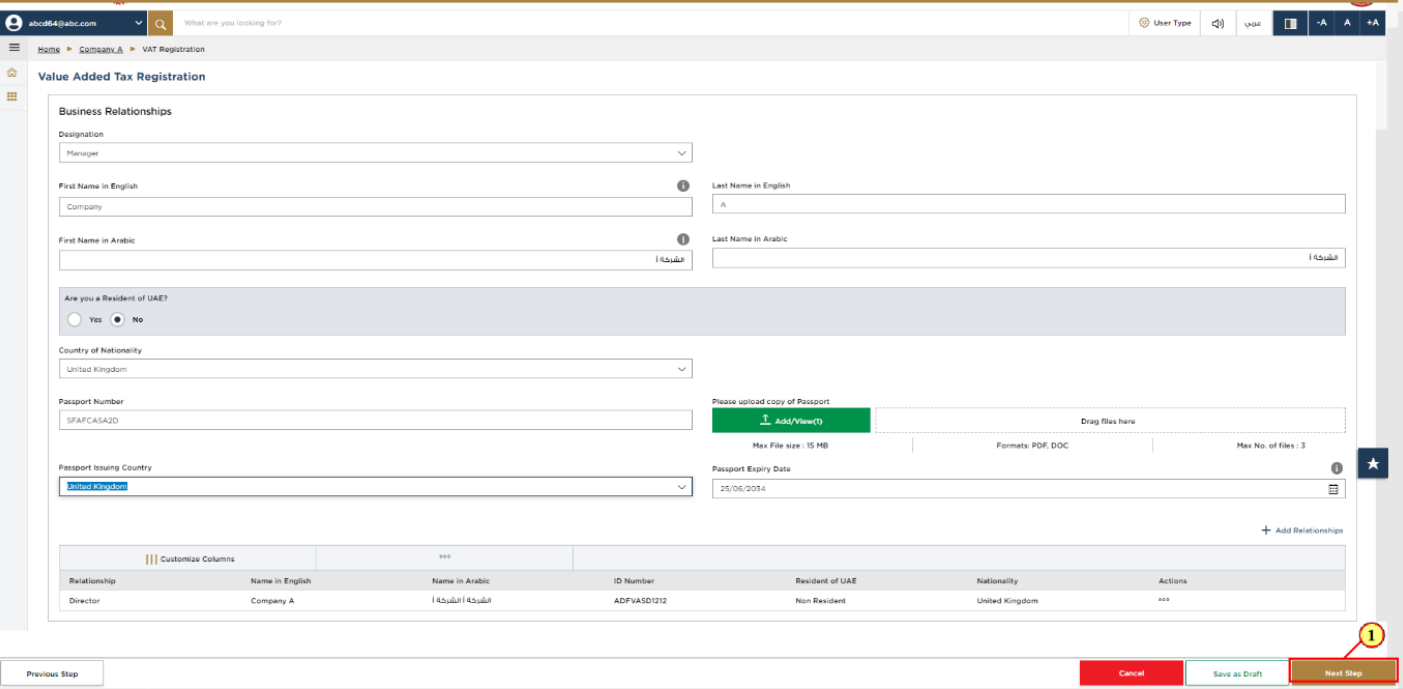
Step | Action |
(1) | After completing all the mandatory fields, click ‘Next Step’ to save and proceed to the 'Bank Details' section. |
19. Bank Details

|
|
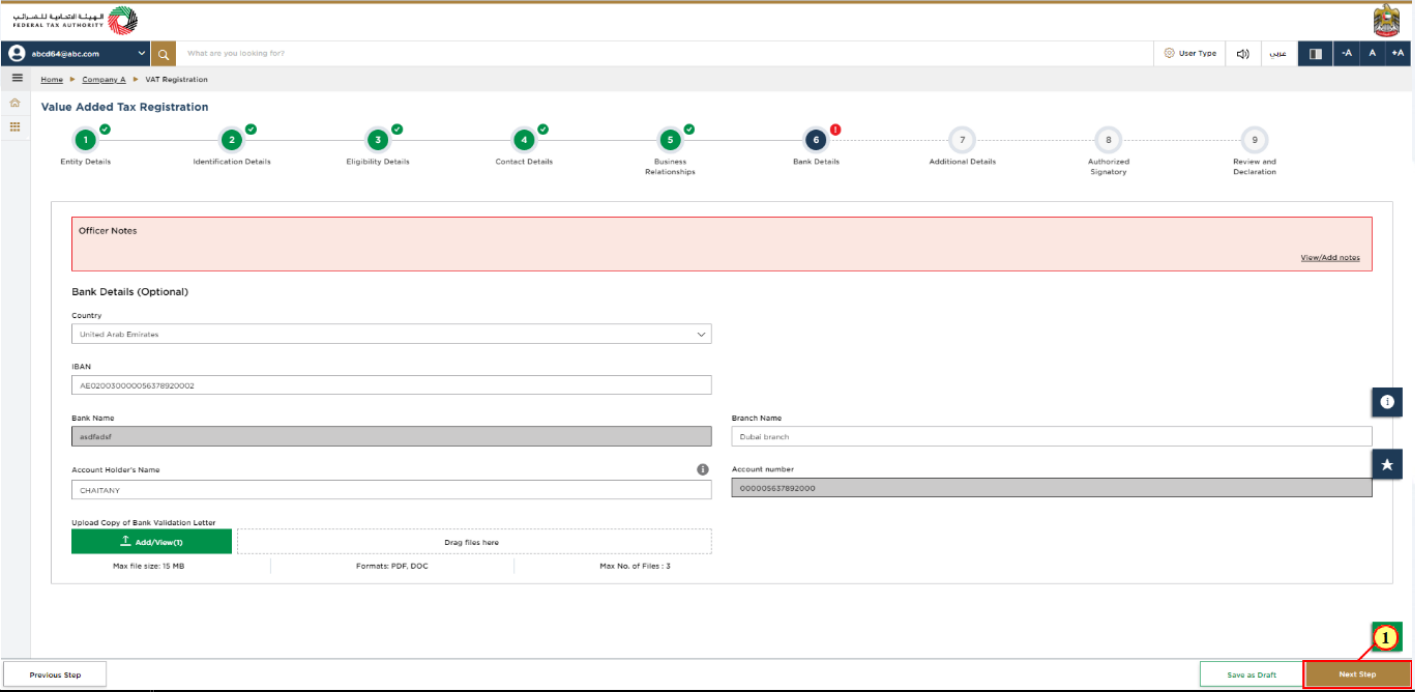
Step | Action |
(1) | You may enter your bank details and click ‘Next Step’ to save and proceed to the 'Additional Details' section |
20. Additional Details
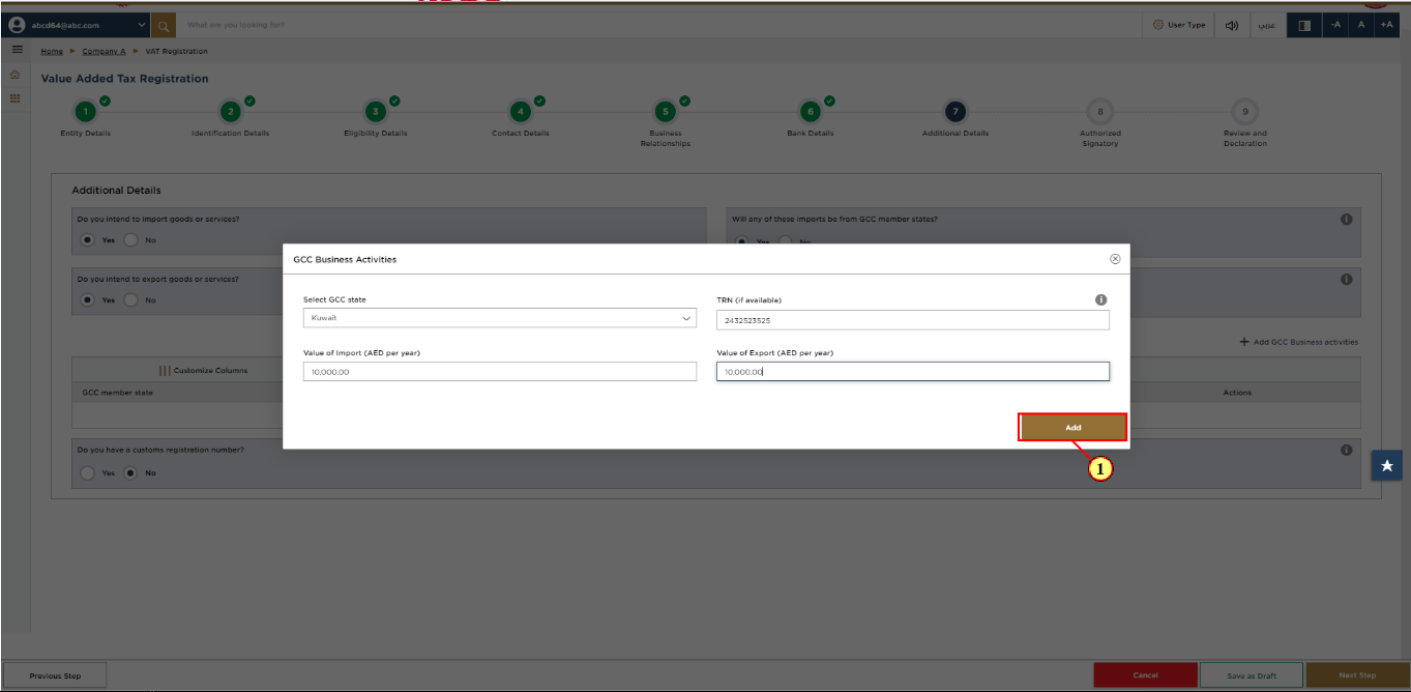
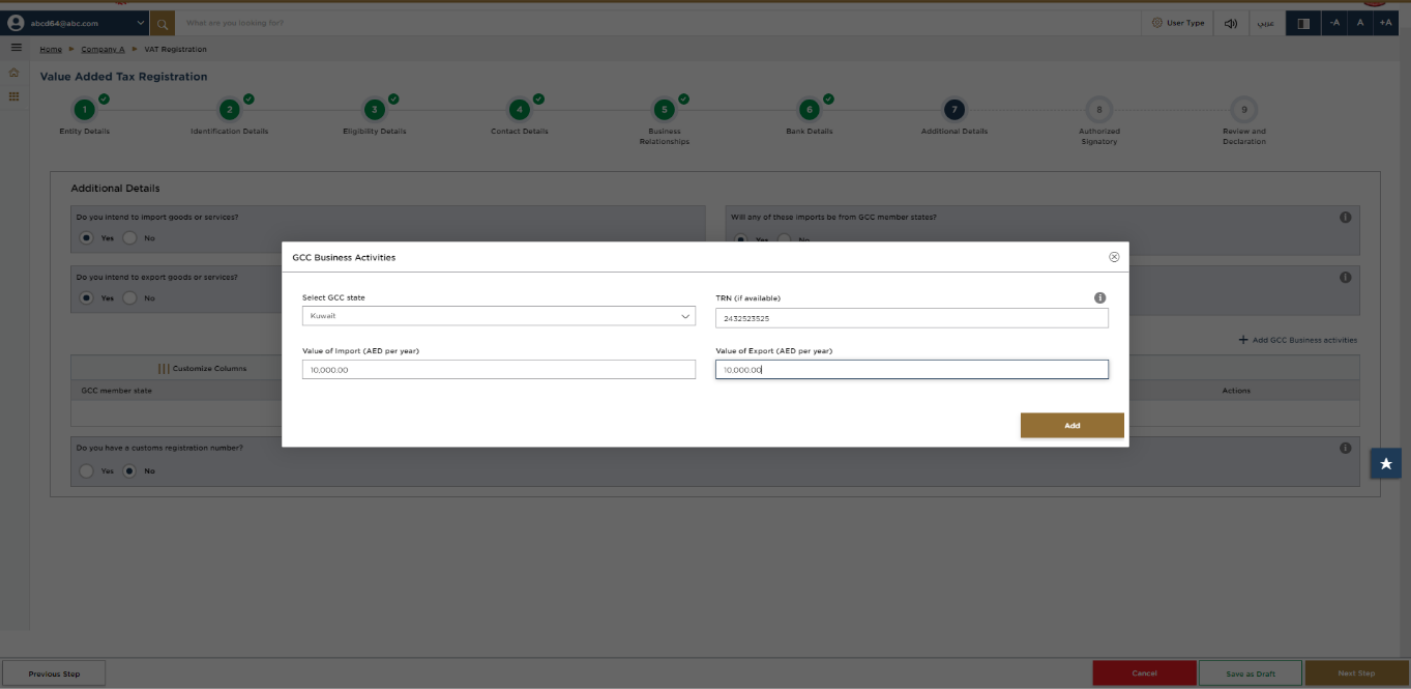
21. GCC Business activities

Step | Action |
(1) | Click ‘Add GCC Business activities’ If the person is intending to import goods or services and these imports are from GCC member states. |
22. Custom details
Step | Action |
(1) |
|
| Do not include the value of any services unless they are directly related to moving goods ( Example., commission, and freight insurance ). |
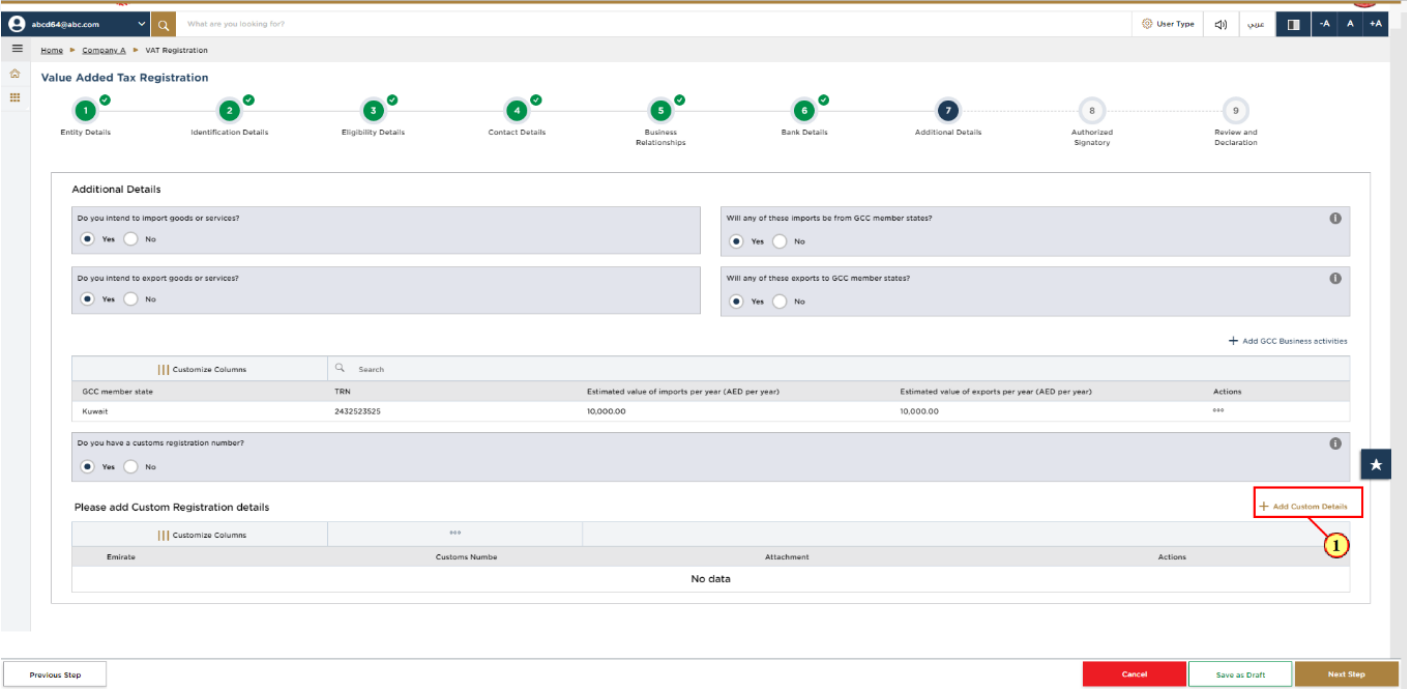
Step | Action |
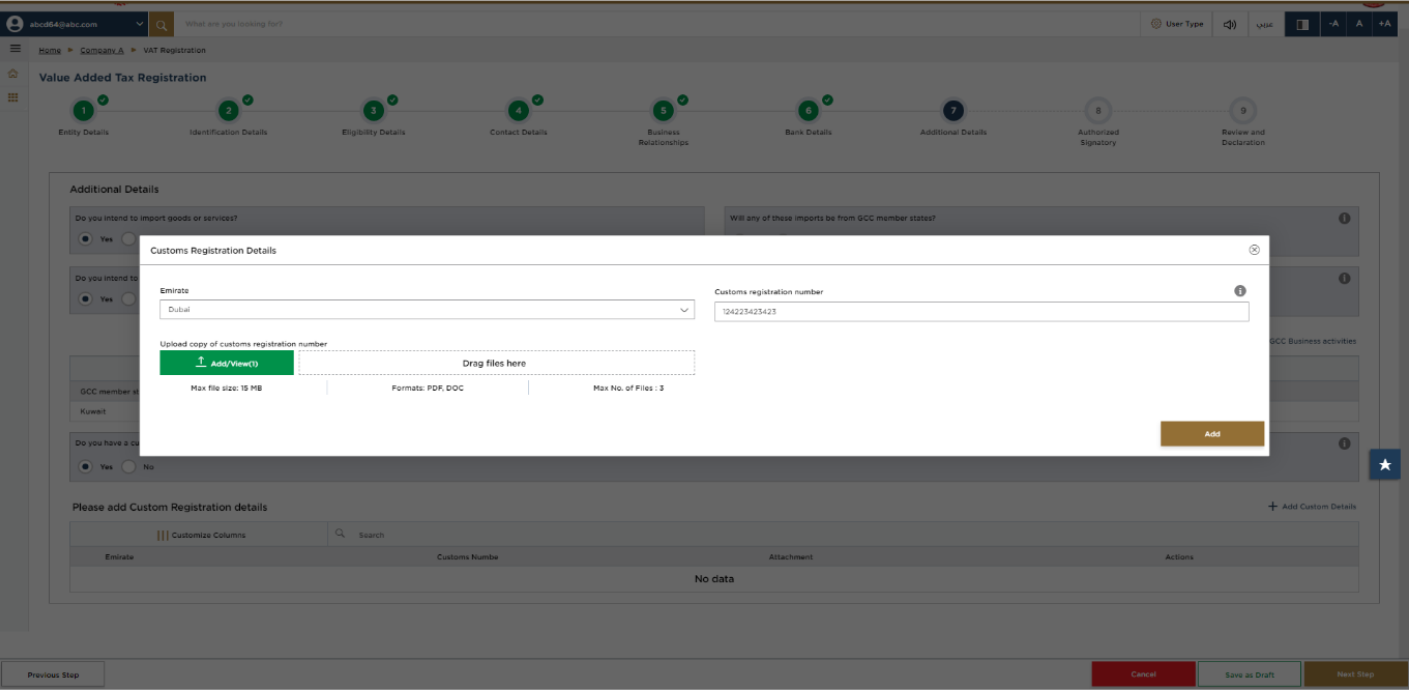
(1) | If you are registered with any of the Customs Authorities in the UAE, select ‘Yes’ and click ‘Add Custom Details’ to enter the customs registration details. |
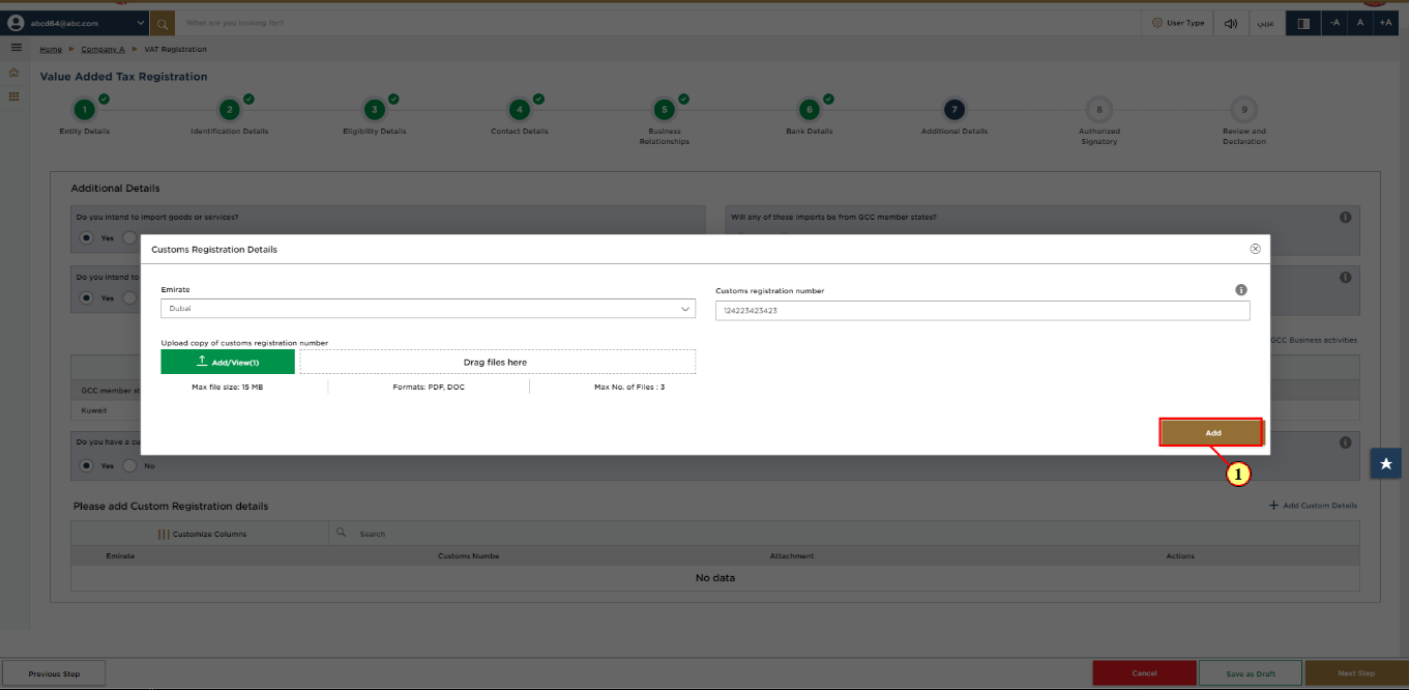
Step | Action |
(1) |
|
|
|
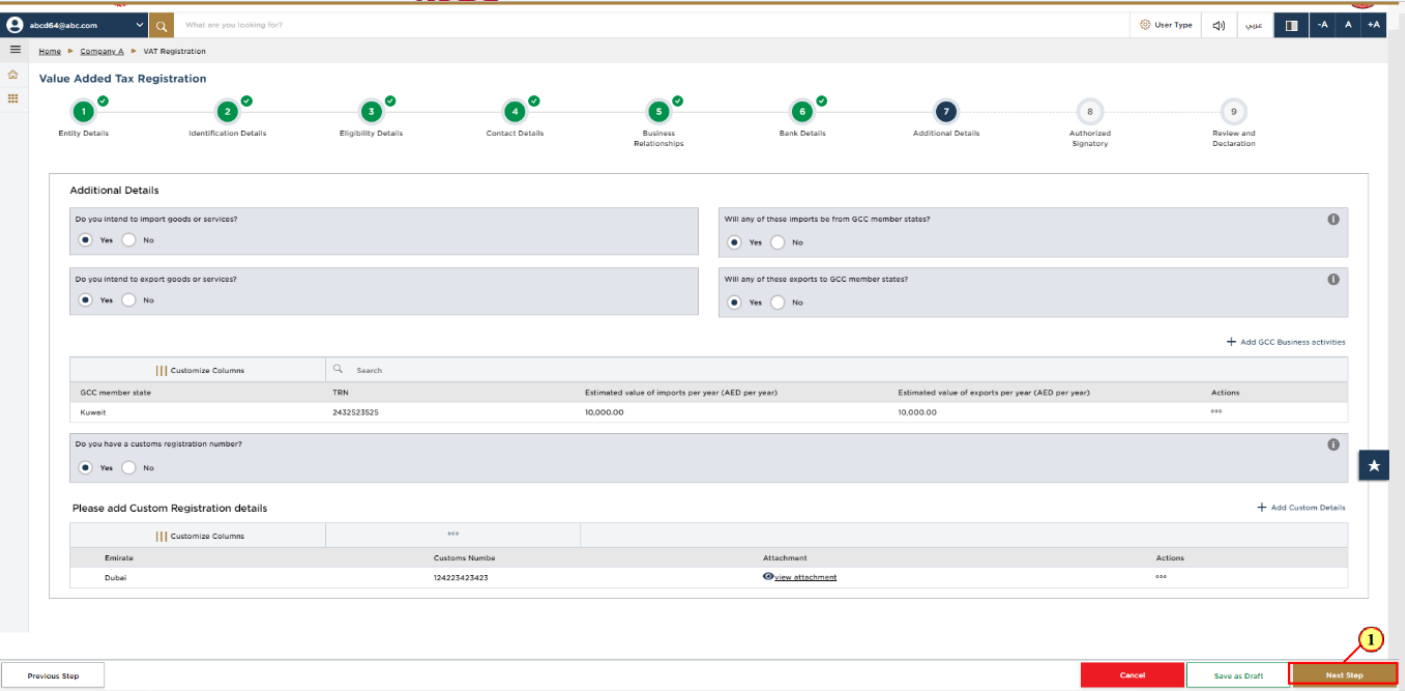
Step | Action |
(1) | After completing all mandatory fields, click ‘Next Step’ to save and proceed to the 'Authorized Signatory' section. |
23. Authorized Signatory
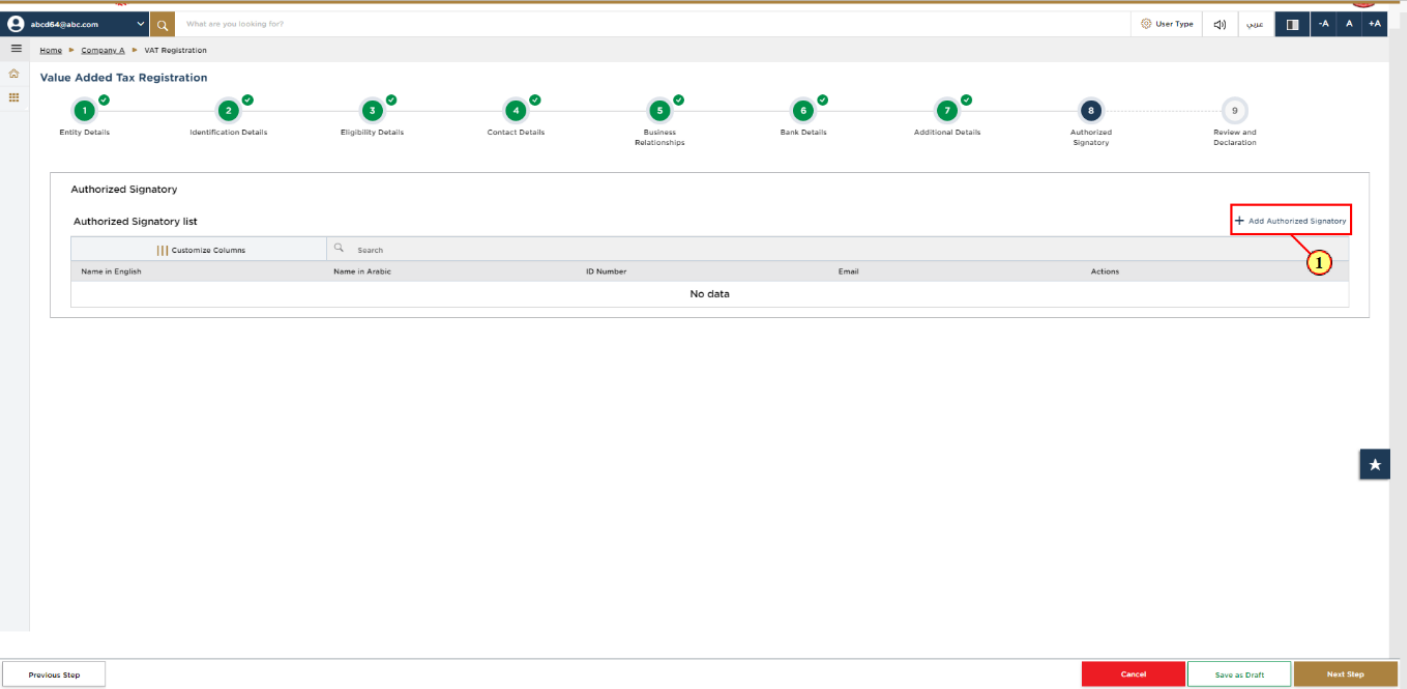
Step | Action |
(1) | Click 'Add Authorized Signatory' to enter the Authorized Signatory details. |
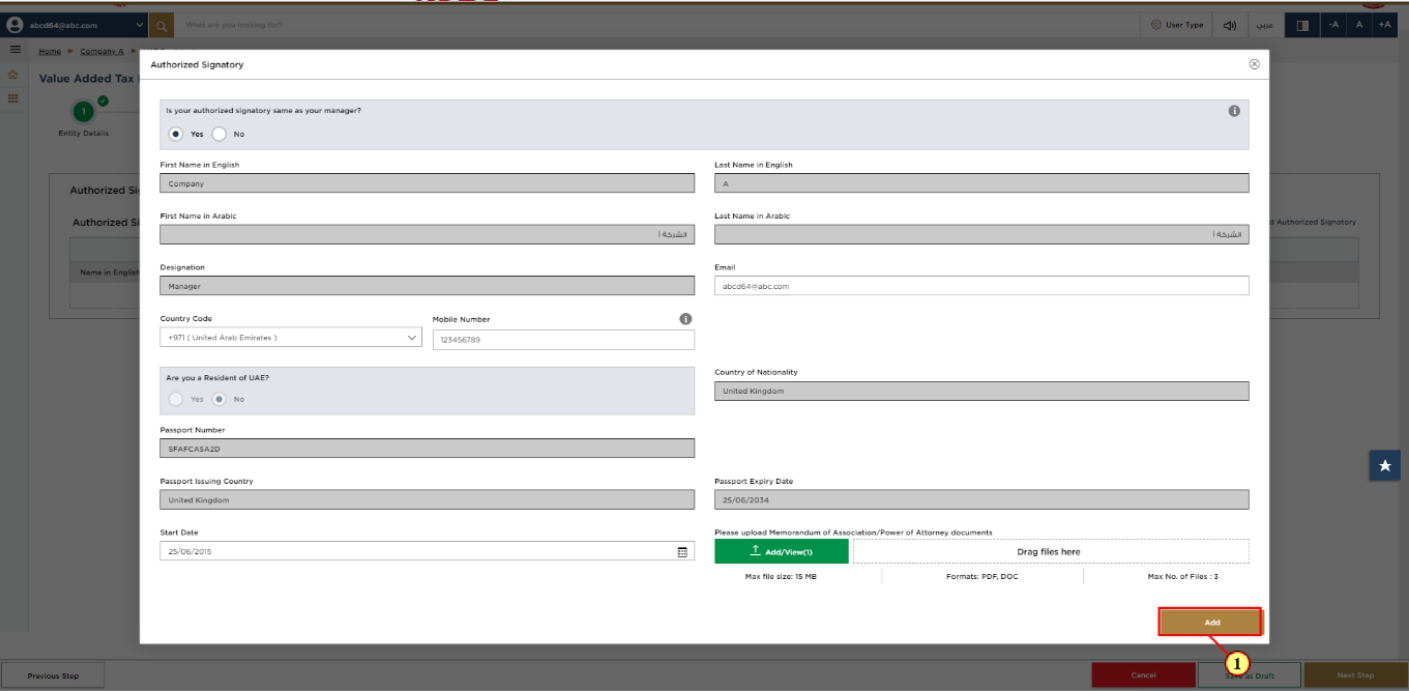
Step | Action |
(1) |
|

|
|
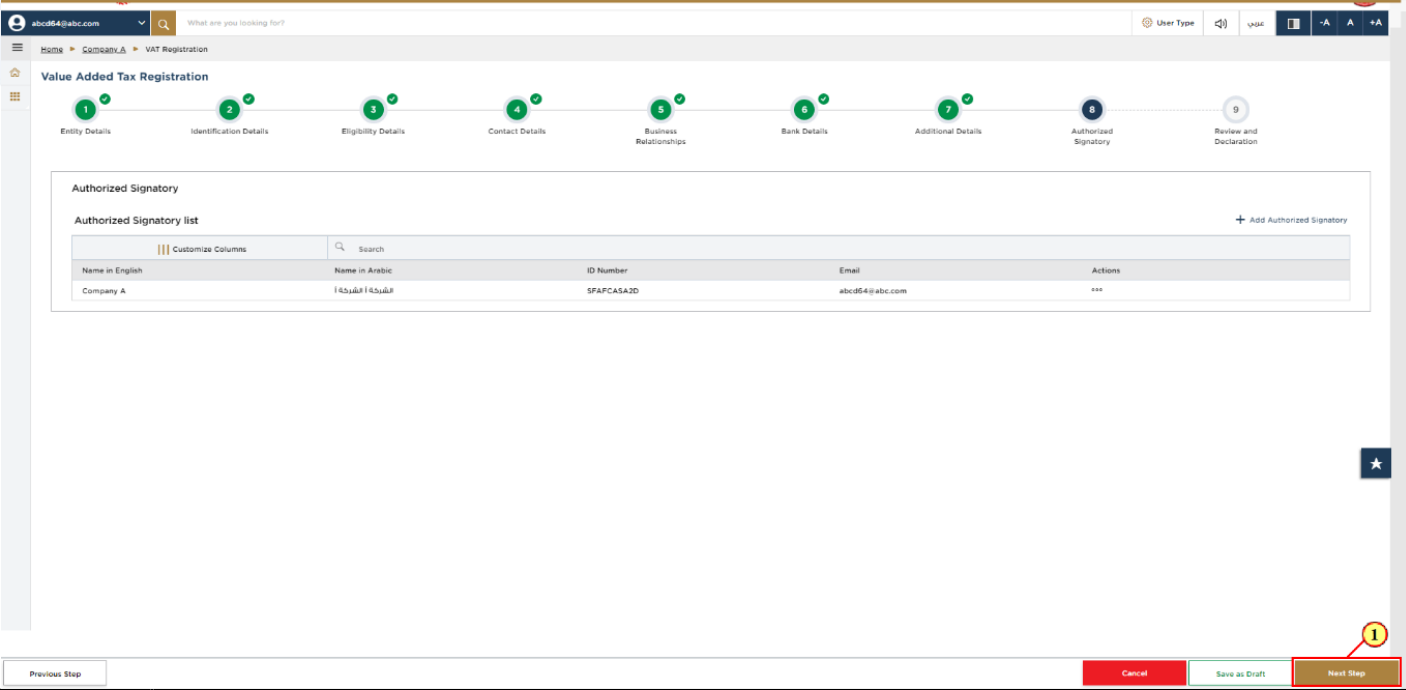
Step | Action |
(1) | After completing all mandatory fields, click ‘Next Step’ to save and proceed to the 'Review and Declaration' section. |
24. Review and Declaration

| This section highlights all the details entered by you across the application. You are requested to review and submit the application formally. |
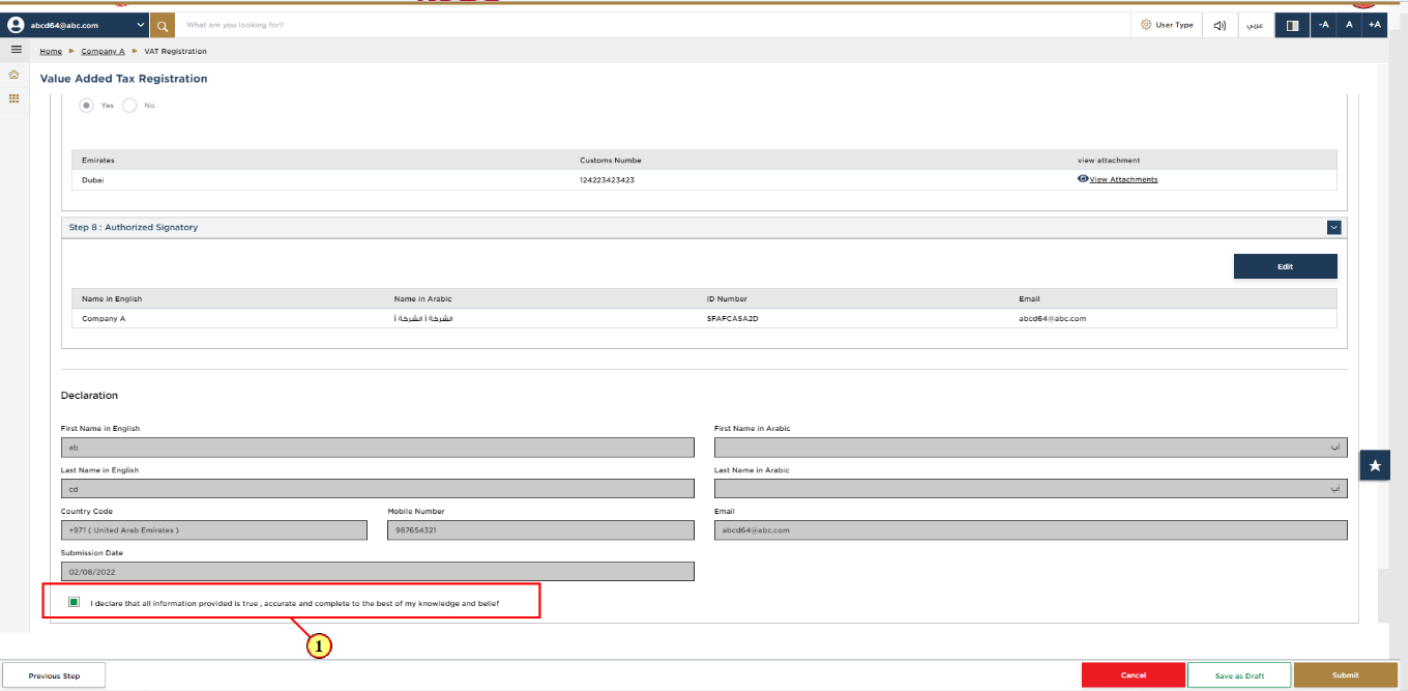
Step | Action |
(1) | After carefully reviewing all of the information entered on the application, mark the checkbox to declare the correctness of the information provided in the application. |
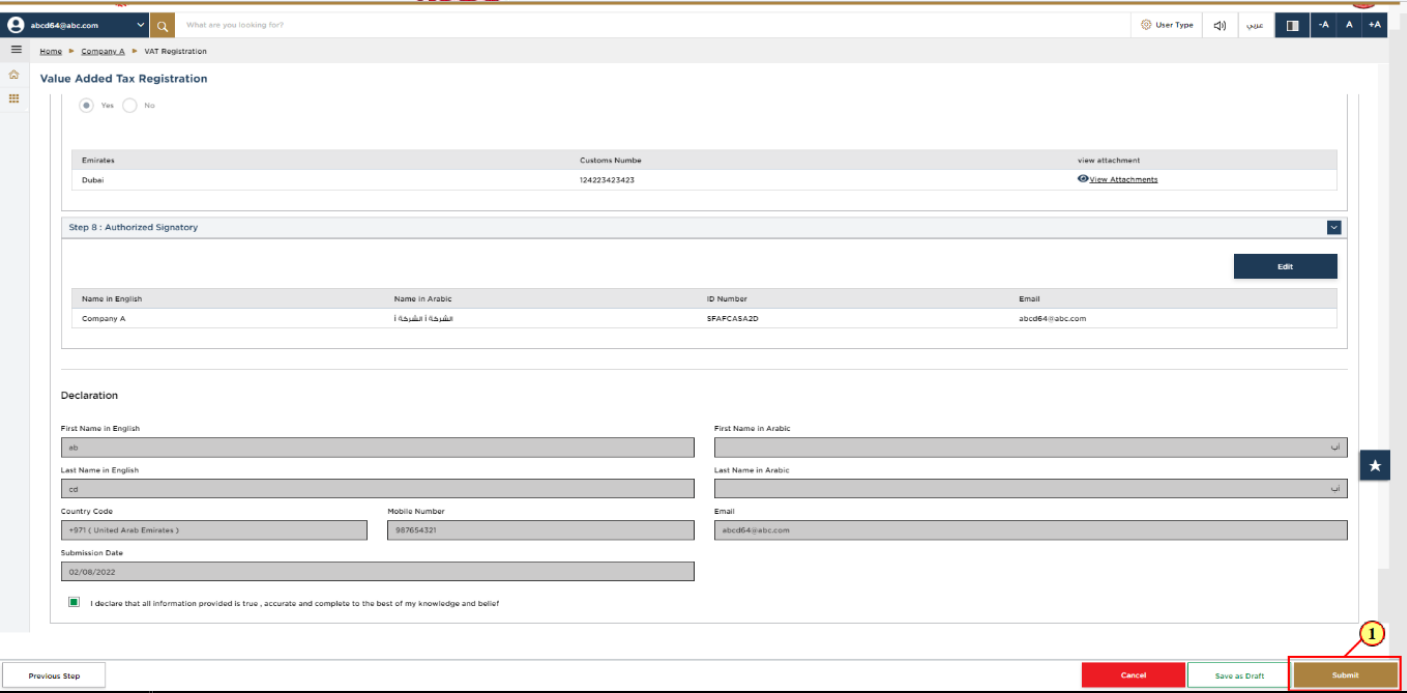
Step | Action |
(1) | Click ‘Submit’ to submit the VAT Registration application. |
25. Post Application Submission
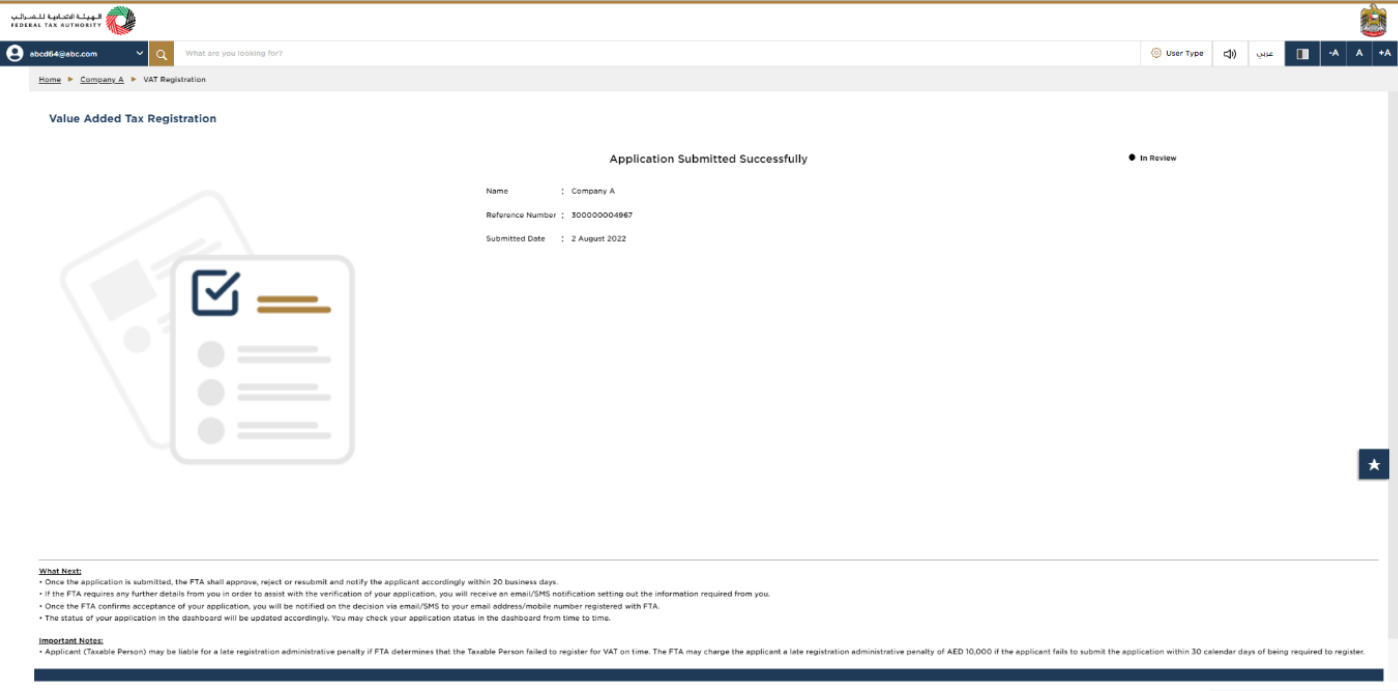
| After your application is submitted successfully, a Reference Number is generated for your submitted application. Note this reference number for future communication with FTA. What’s next?
|
26. Correspondences
Taxpayer receives the following correspondences:
Application submission acknowledgement.
Additional information notification (only if FTA requires more information to assist with their review of your application).
Application approval or rejection notification.